
Alesia’s Art Activities
Alesia Lacina has a long history of arts education in Grinnell. Here are some of her favorite art activities for you!

Character Map
Using the following categories as a guide, let the kids create a character. With the finished description, have the kids write a story based on the character or illustrate what they think this character looks like.
- Name
- Personality
- Favorite things
- Dislikes
- Family
- Friends
- Appearance/looks
- Whatever else you want to add!

Silly Sentences
At first glance, this isn't a craft. Silly Sentences is actually an educational game available for purchase. The basic idea is to create fun, absurd sentences using puzzle pieces which are separated into nouns, verbs, prepositions, and other parts of speech.
To turn this into an art project, let the kids illustrate these entertaining lines. To make it a writing activity, use the silly sentence to spark a story idea.
Materials
Silly Sentences puzzle tiles
Instructions
Toplay with a few kids, divide the pieces between each person. Take turns playing a fitting piece until the sentence is completed.
To play as a group, keep all of the pieces in one pile and let each person choose a piece that will fit.
Source

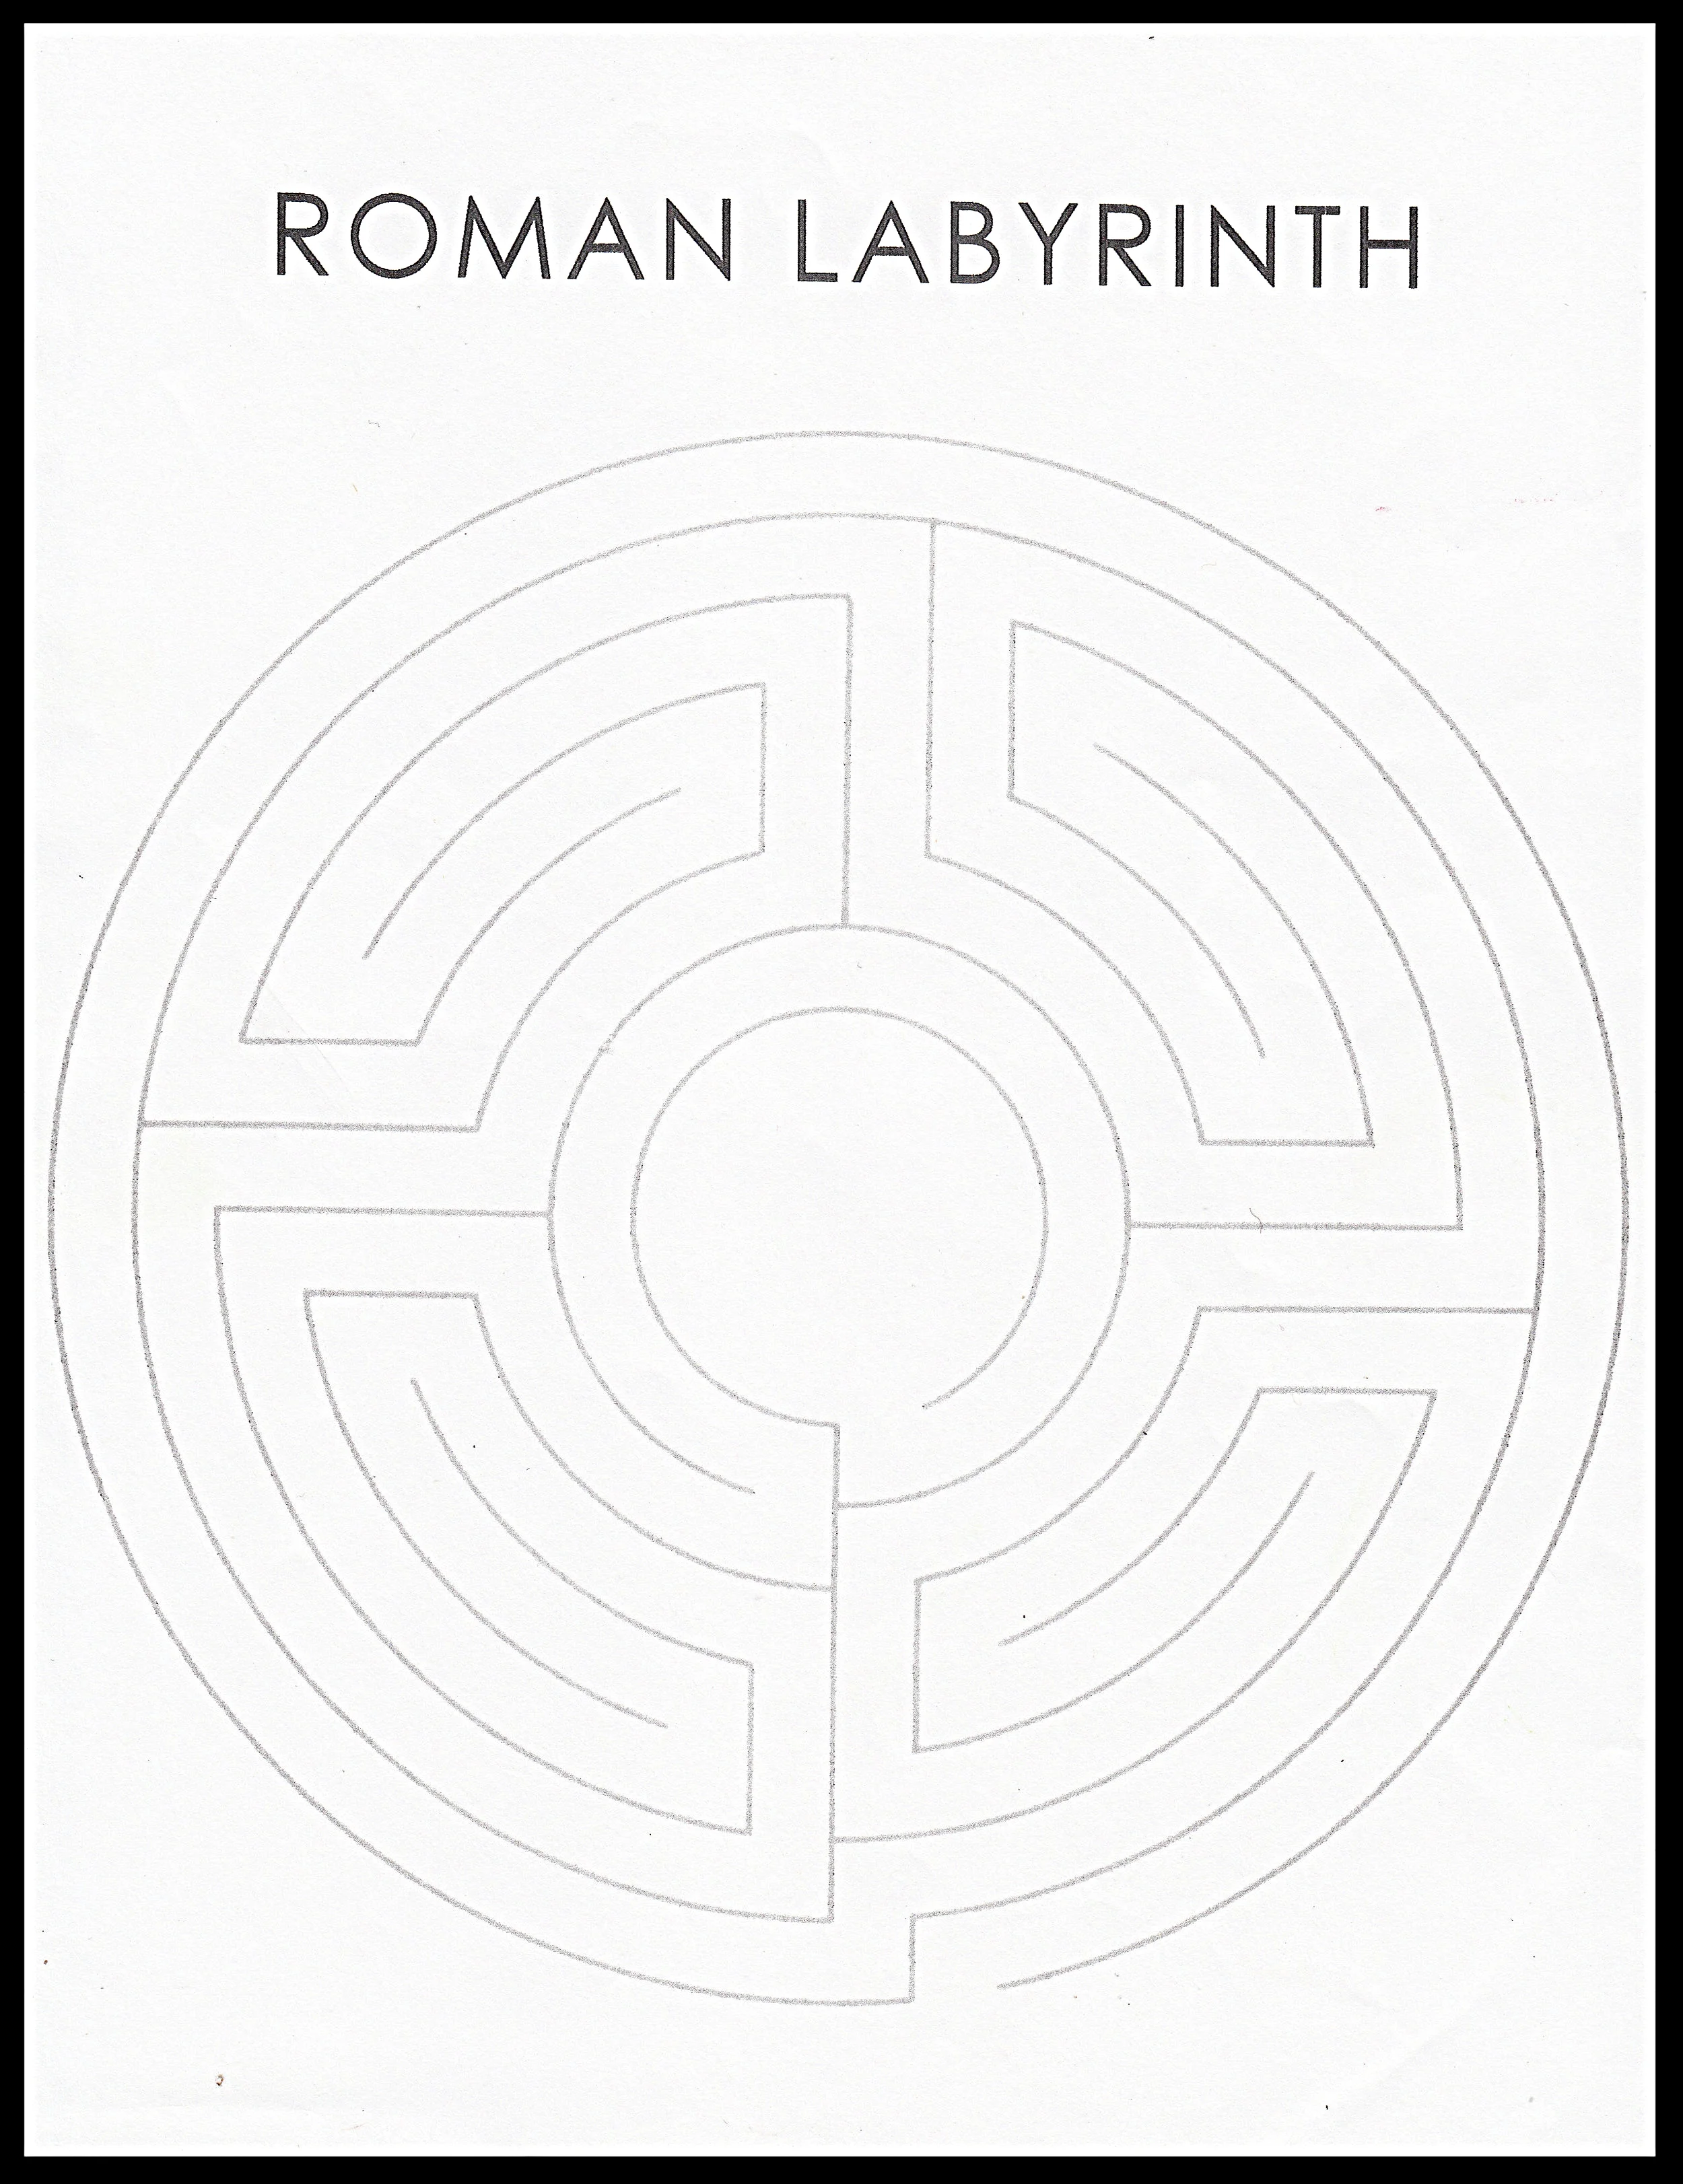
Labyrinth Coloring
Here is a great coloring or activity page! Just color them or use completed pages as story starters. This is a good back up activity that doesn’t take much time or materials.
Materials
- Labyrinth printouts (Click the image to print)
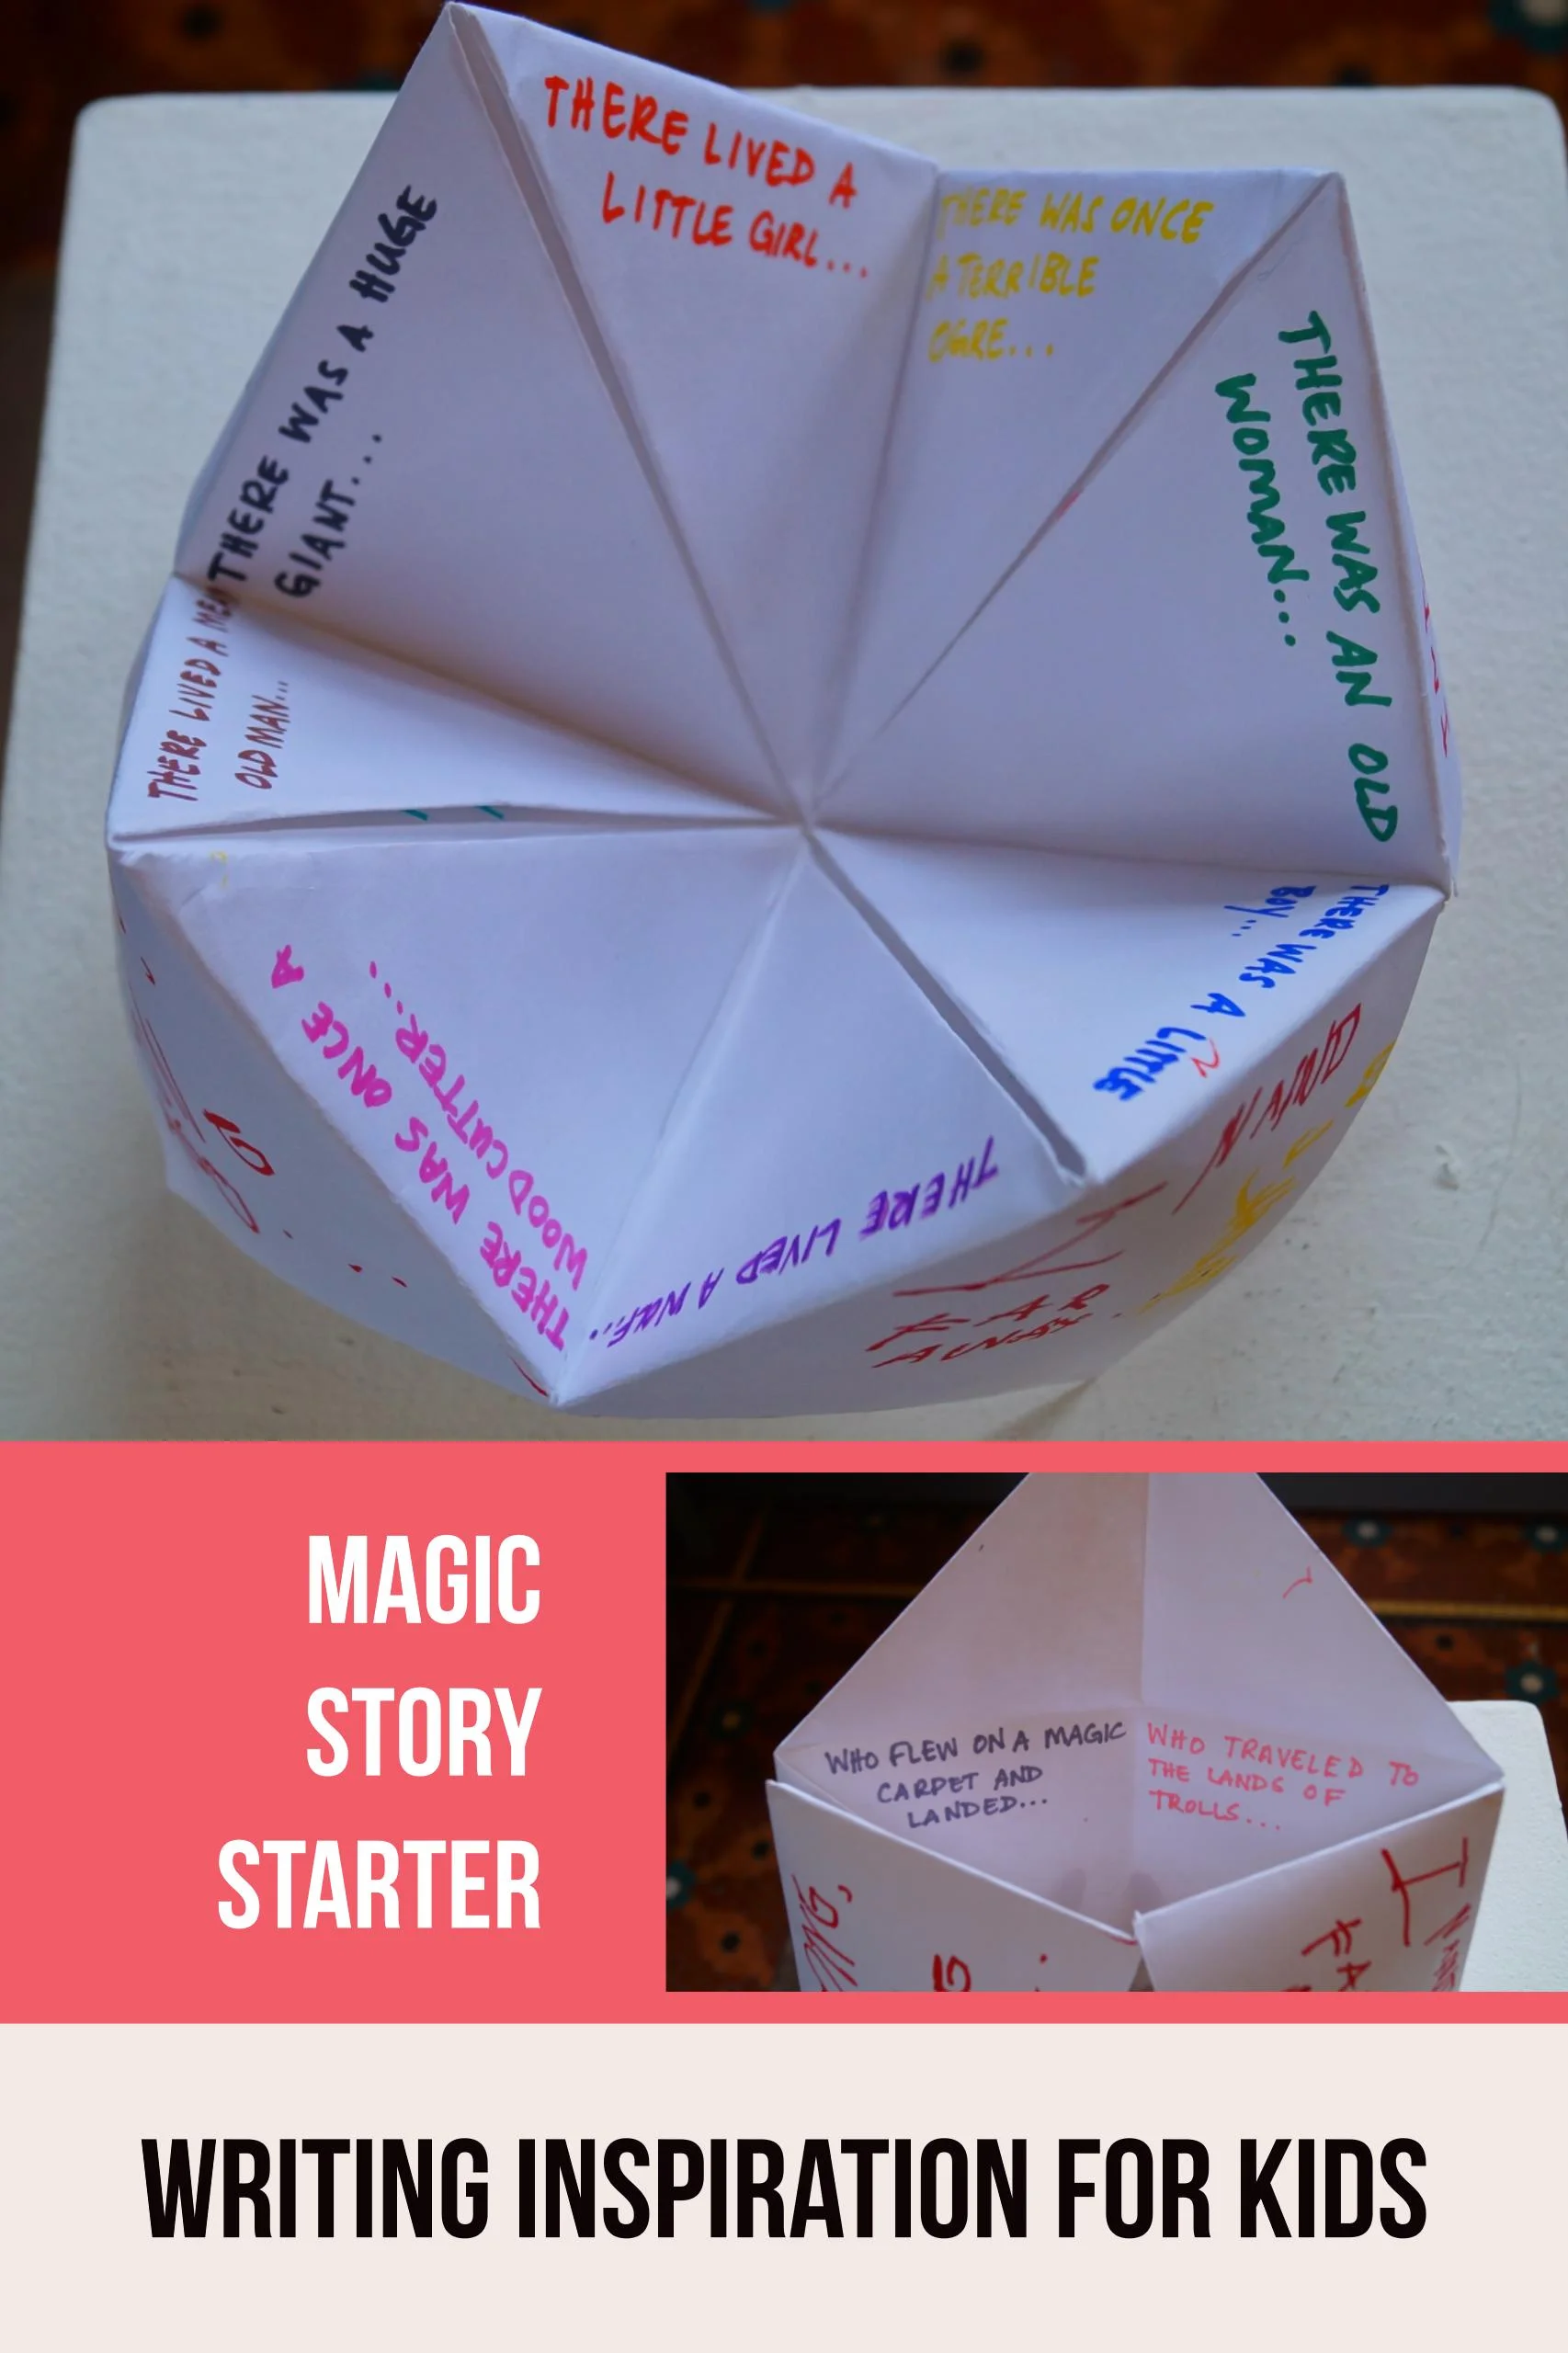
Magic Story Starter
This may seem like an intimidating project if you've never made a fortune teller, but it is fun. And it's a great way to get kids writing! In case of confusion, we added lots of pictures. Still, if you have trouble, don't feel bad! There are many different tutorials on the internet for more help.
Materials
Large square pieces of white paper
Pencils/markers
Instructions
- Fold paper like a fortune teller.
1a. Take a piece of paper and fold it in half, corner to corner. Unfold and repeat with the other corners. You will end up with 2 diagonal creases.
1b. With the paper unfolded back into a square, fold each corner into the center. Do not unfold these.
1c. Flip over. Fold each corner into the center again.
1d. Fold in half to make creases again. These should be horizontal and vertical, though.
1e. With the paper open facing up now, slide one hand underneath into the pockets on the bottom. Place your thumb in one pocket, your fingers in another. Do the same with your other hand. Bring all the points to the middle.
2. Have the kids write the very beginnings of a story on the outer four squares of the fortune teller (ex: Once upon a time..., Long long ago..., Deep in a forest...).
3. On the middle eight triangles, introduce a main character (ex: there was a little boy..., there was a baby dragon..., there was a beautiful princess…). Number each triangle as well.
4. Flipping up one of the flaps of the middle layer reveals the final, third layer. On this layer, write an action on each triangle that corresponds to the character on the middle layer triangle above (ex: who walked through a magic door and found himself in..., who was just learning to fly, when..., who picked an enchanted flower that...)
5. To use the story starter, have someone choose a story opening. As you say each word aloud, flap the fortune teller open from side to side. Once for each word. Next, have someone choose a number from the visible triangles. Flap the fortune teller open from side to side however many times the number indicates. Finally, have someone pick another number from the four visible triangles to determine a character. Lift the flap to reveal what the character does. At this point, the kids can write their own stories with the story beginning given.
Tips
Letting the kids make up their own characters and actions makes it more fun for everyone!
A story could be written as a group or individually.
Outer squares of the fortune teller: story opening
Middle triangles of the fortune teller: introduction of a main character (we forgot to number them, but you should mark yours)
Sources
- Book: "Handmade Tales: Stories to Make and Take," by Dianne de Las Casas