
Alesia’s Art Activities
Alesia Lacina has a long history of arts education in Grinnell. Here are some of her favorite art activities for you!
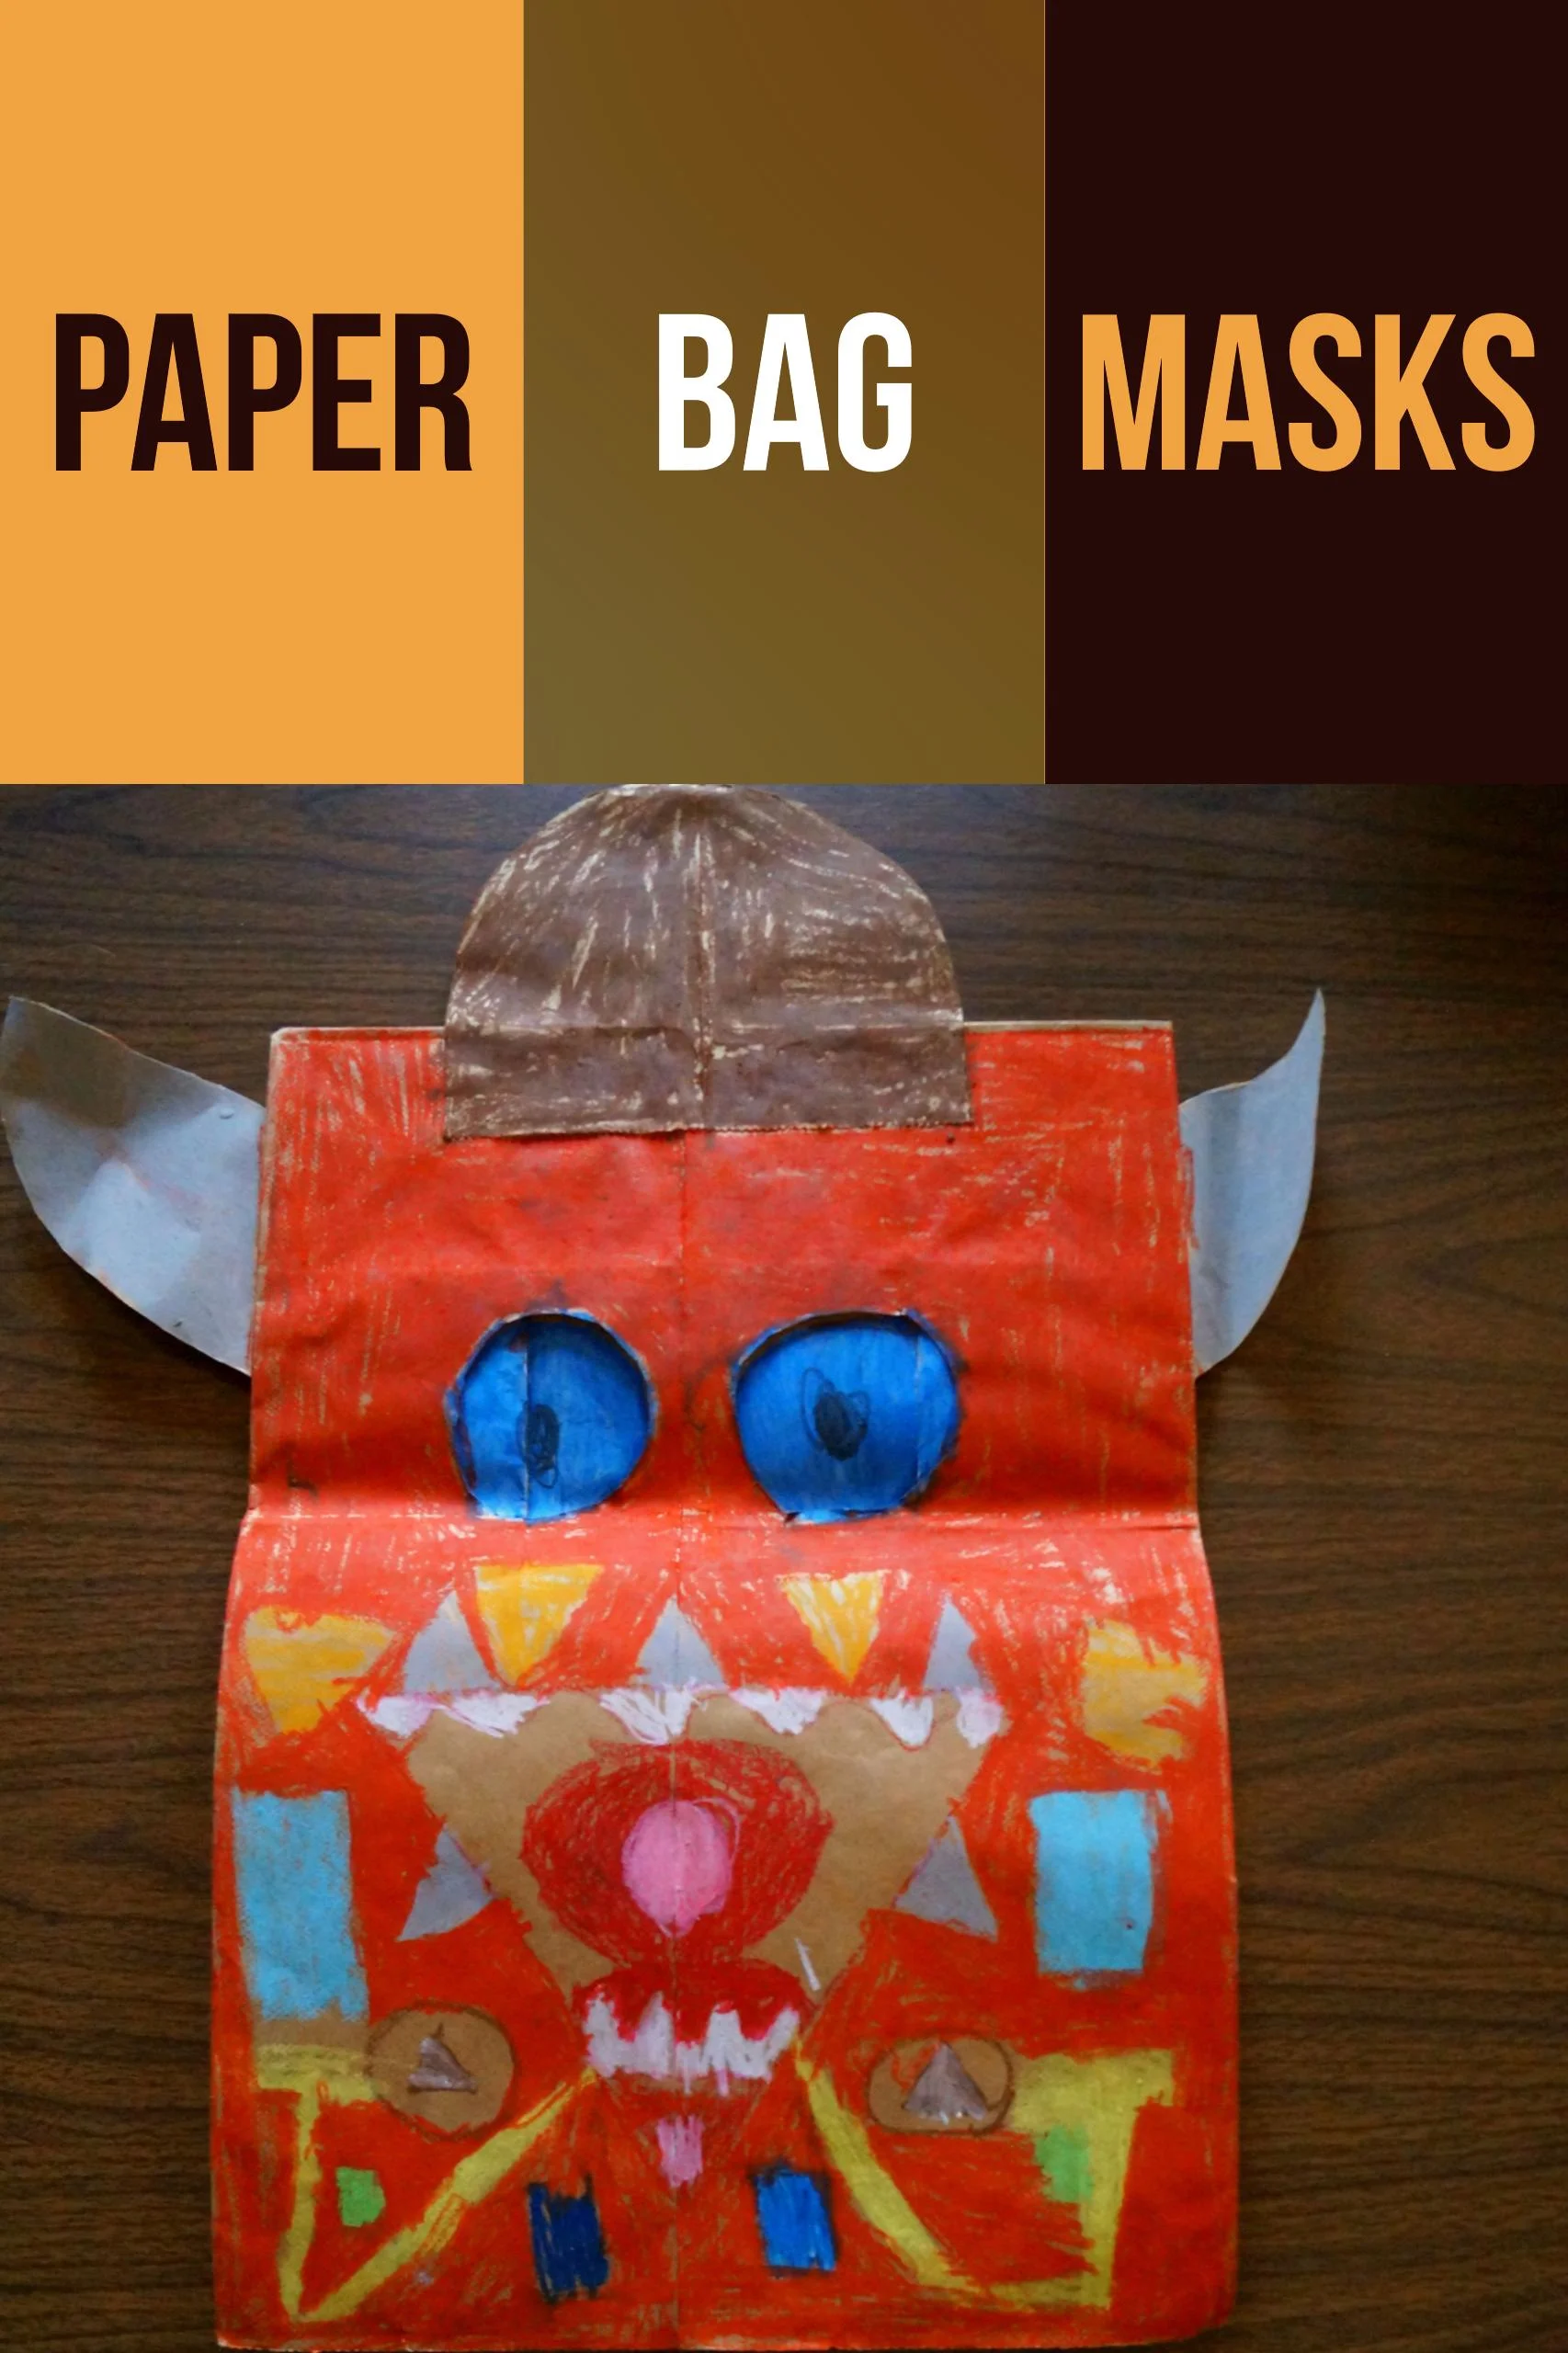
Paper Bag Masks
Materials
- Large paper bag, like those from grocery stores
- Miscellaneous decorating materials
- Scissors
Instructions
- Open the bag and place over the child’s head. Mark where their eyes are on the front of the bag. On the sides, mark where the top of their shoulders are. Take the bag off.
- Cut out large holes where the eyes are marked as well as arches on the sides up to where the shoulder marks are.
- Lay the bag down and let the kid decorate the face.
- Put it back on and wear around.
Tips
- Use the paper cut out from Step 2 to create little accessories or ears to glue onto the bag.
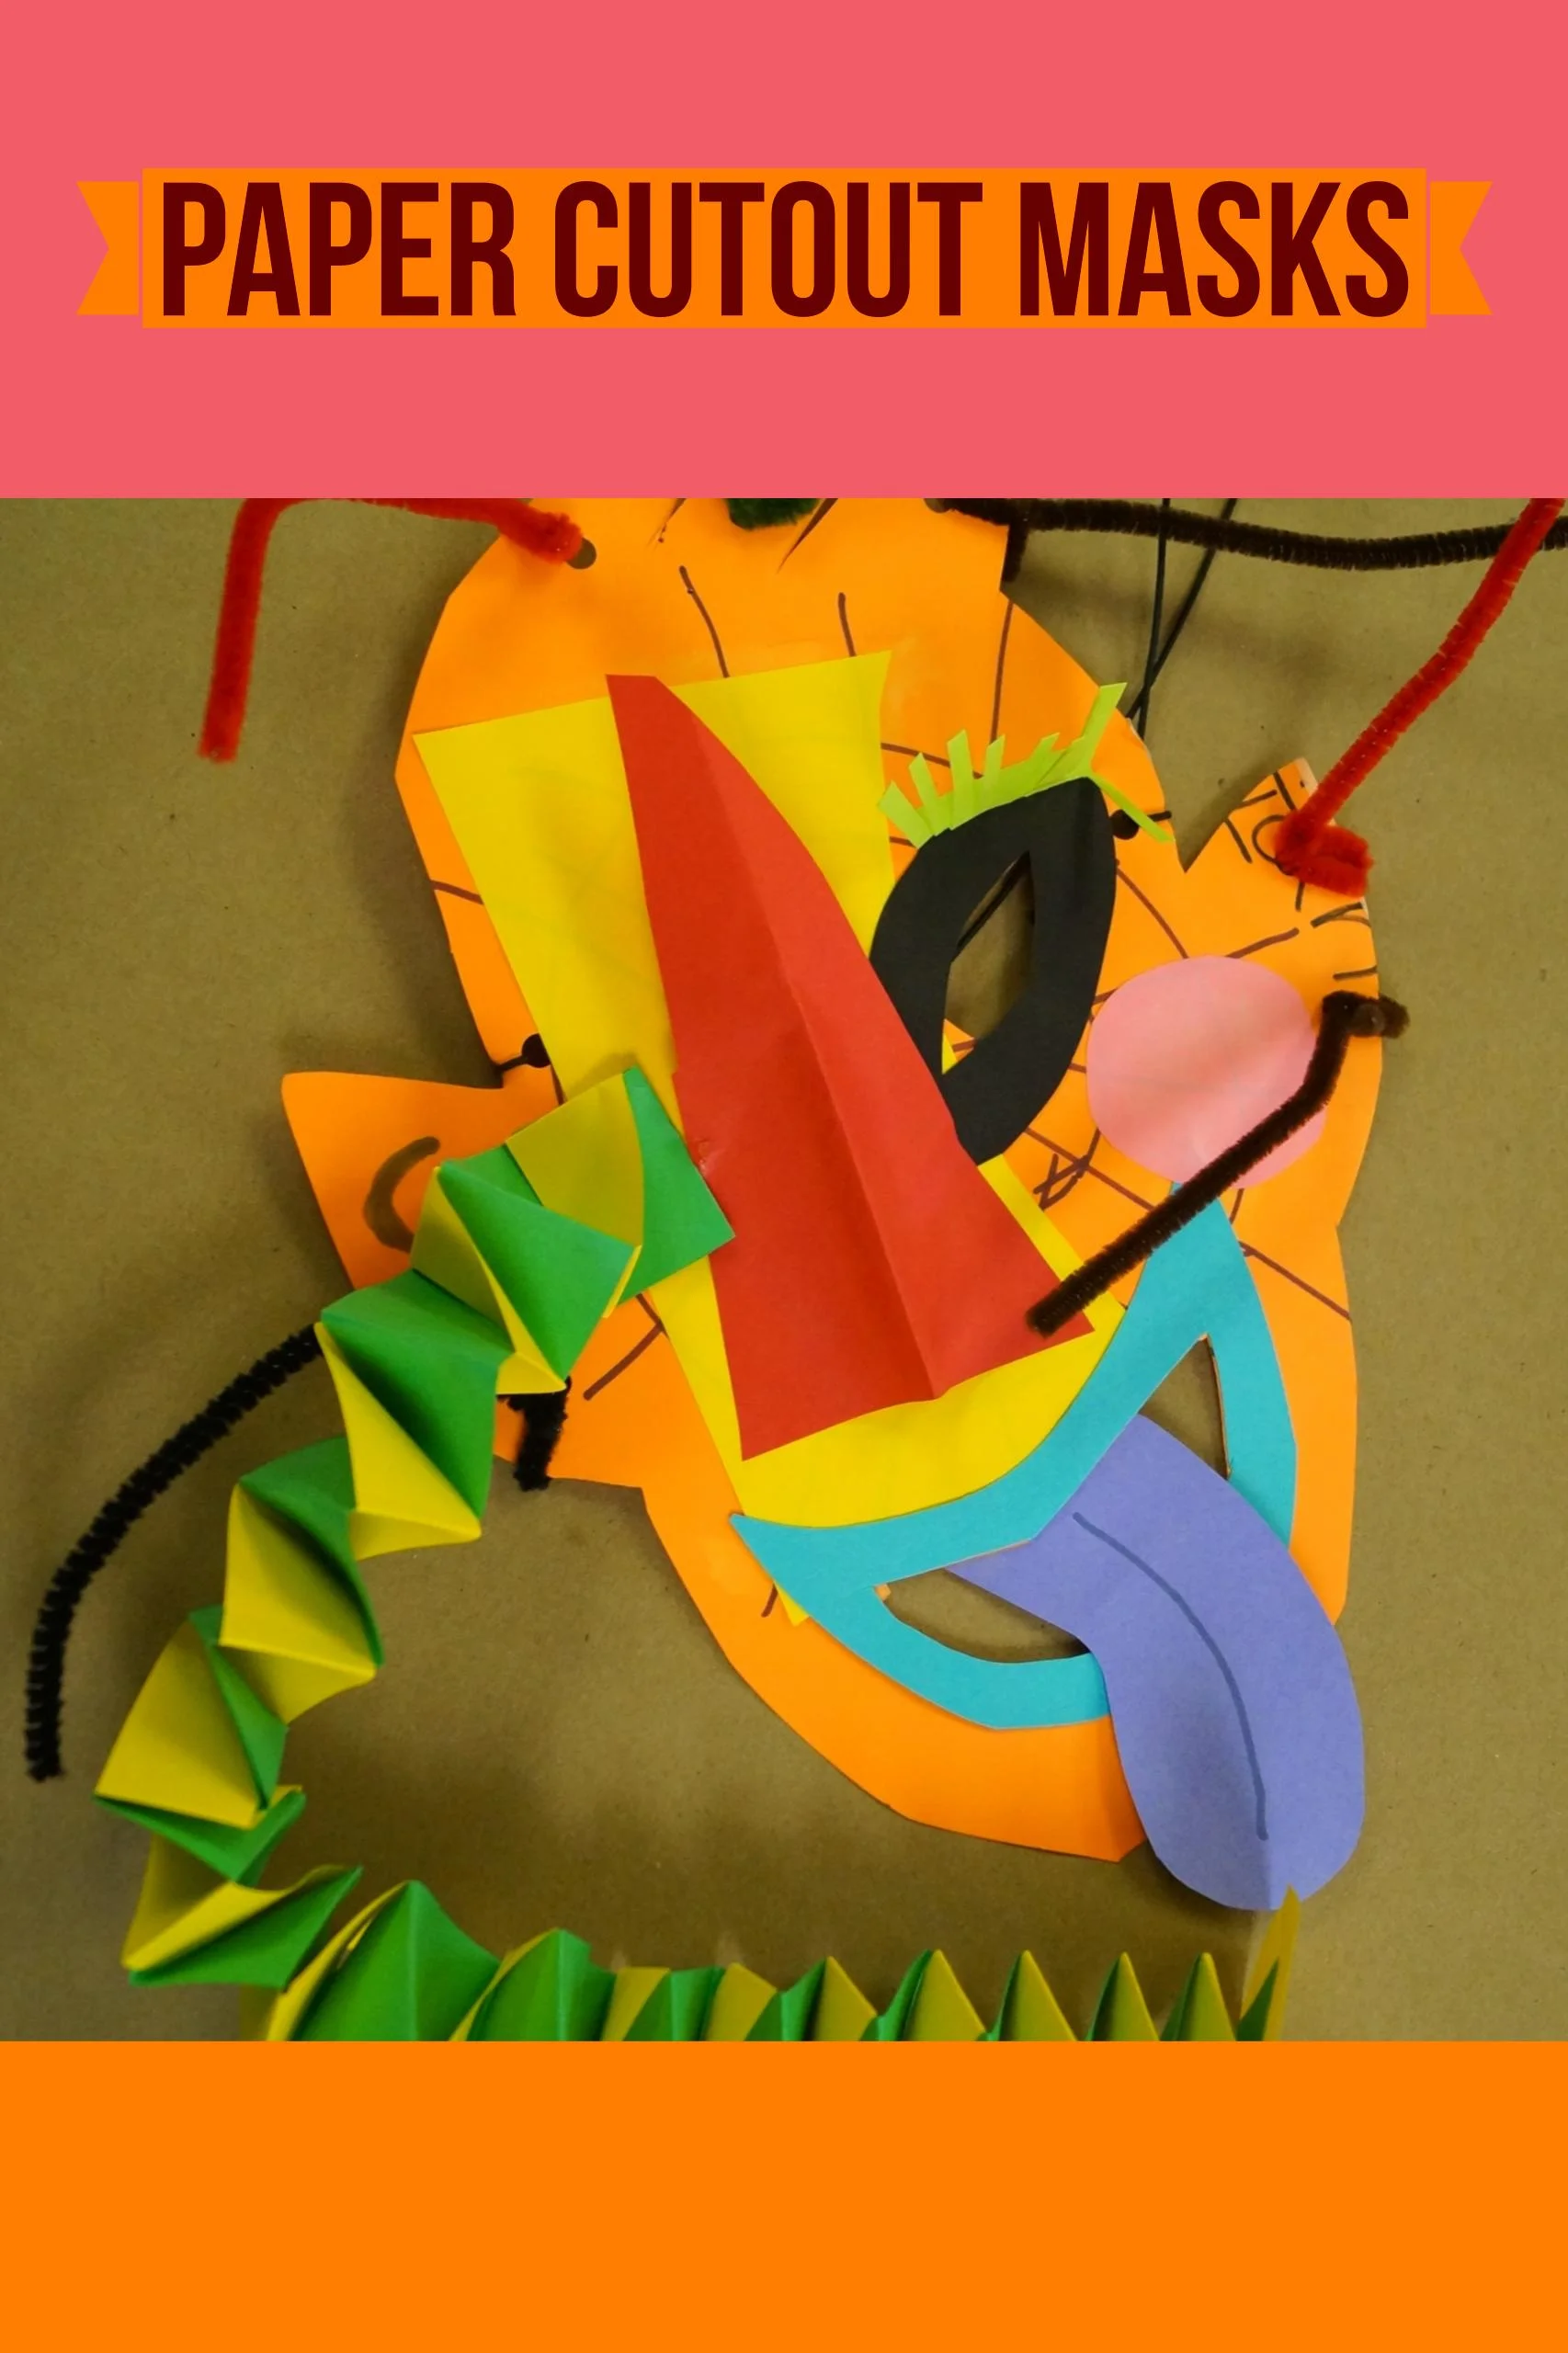
Paper Cutout Masks
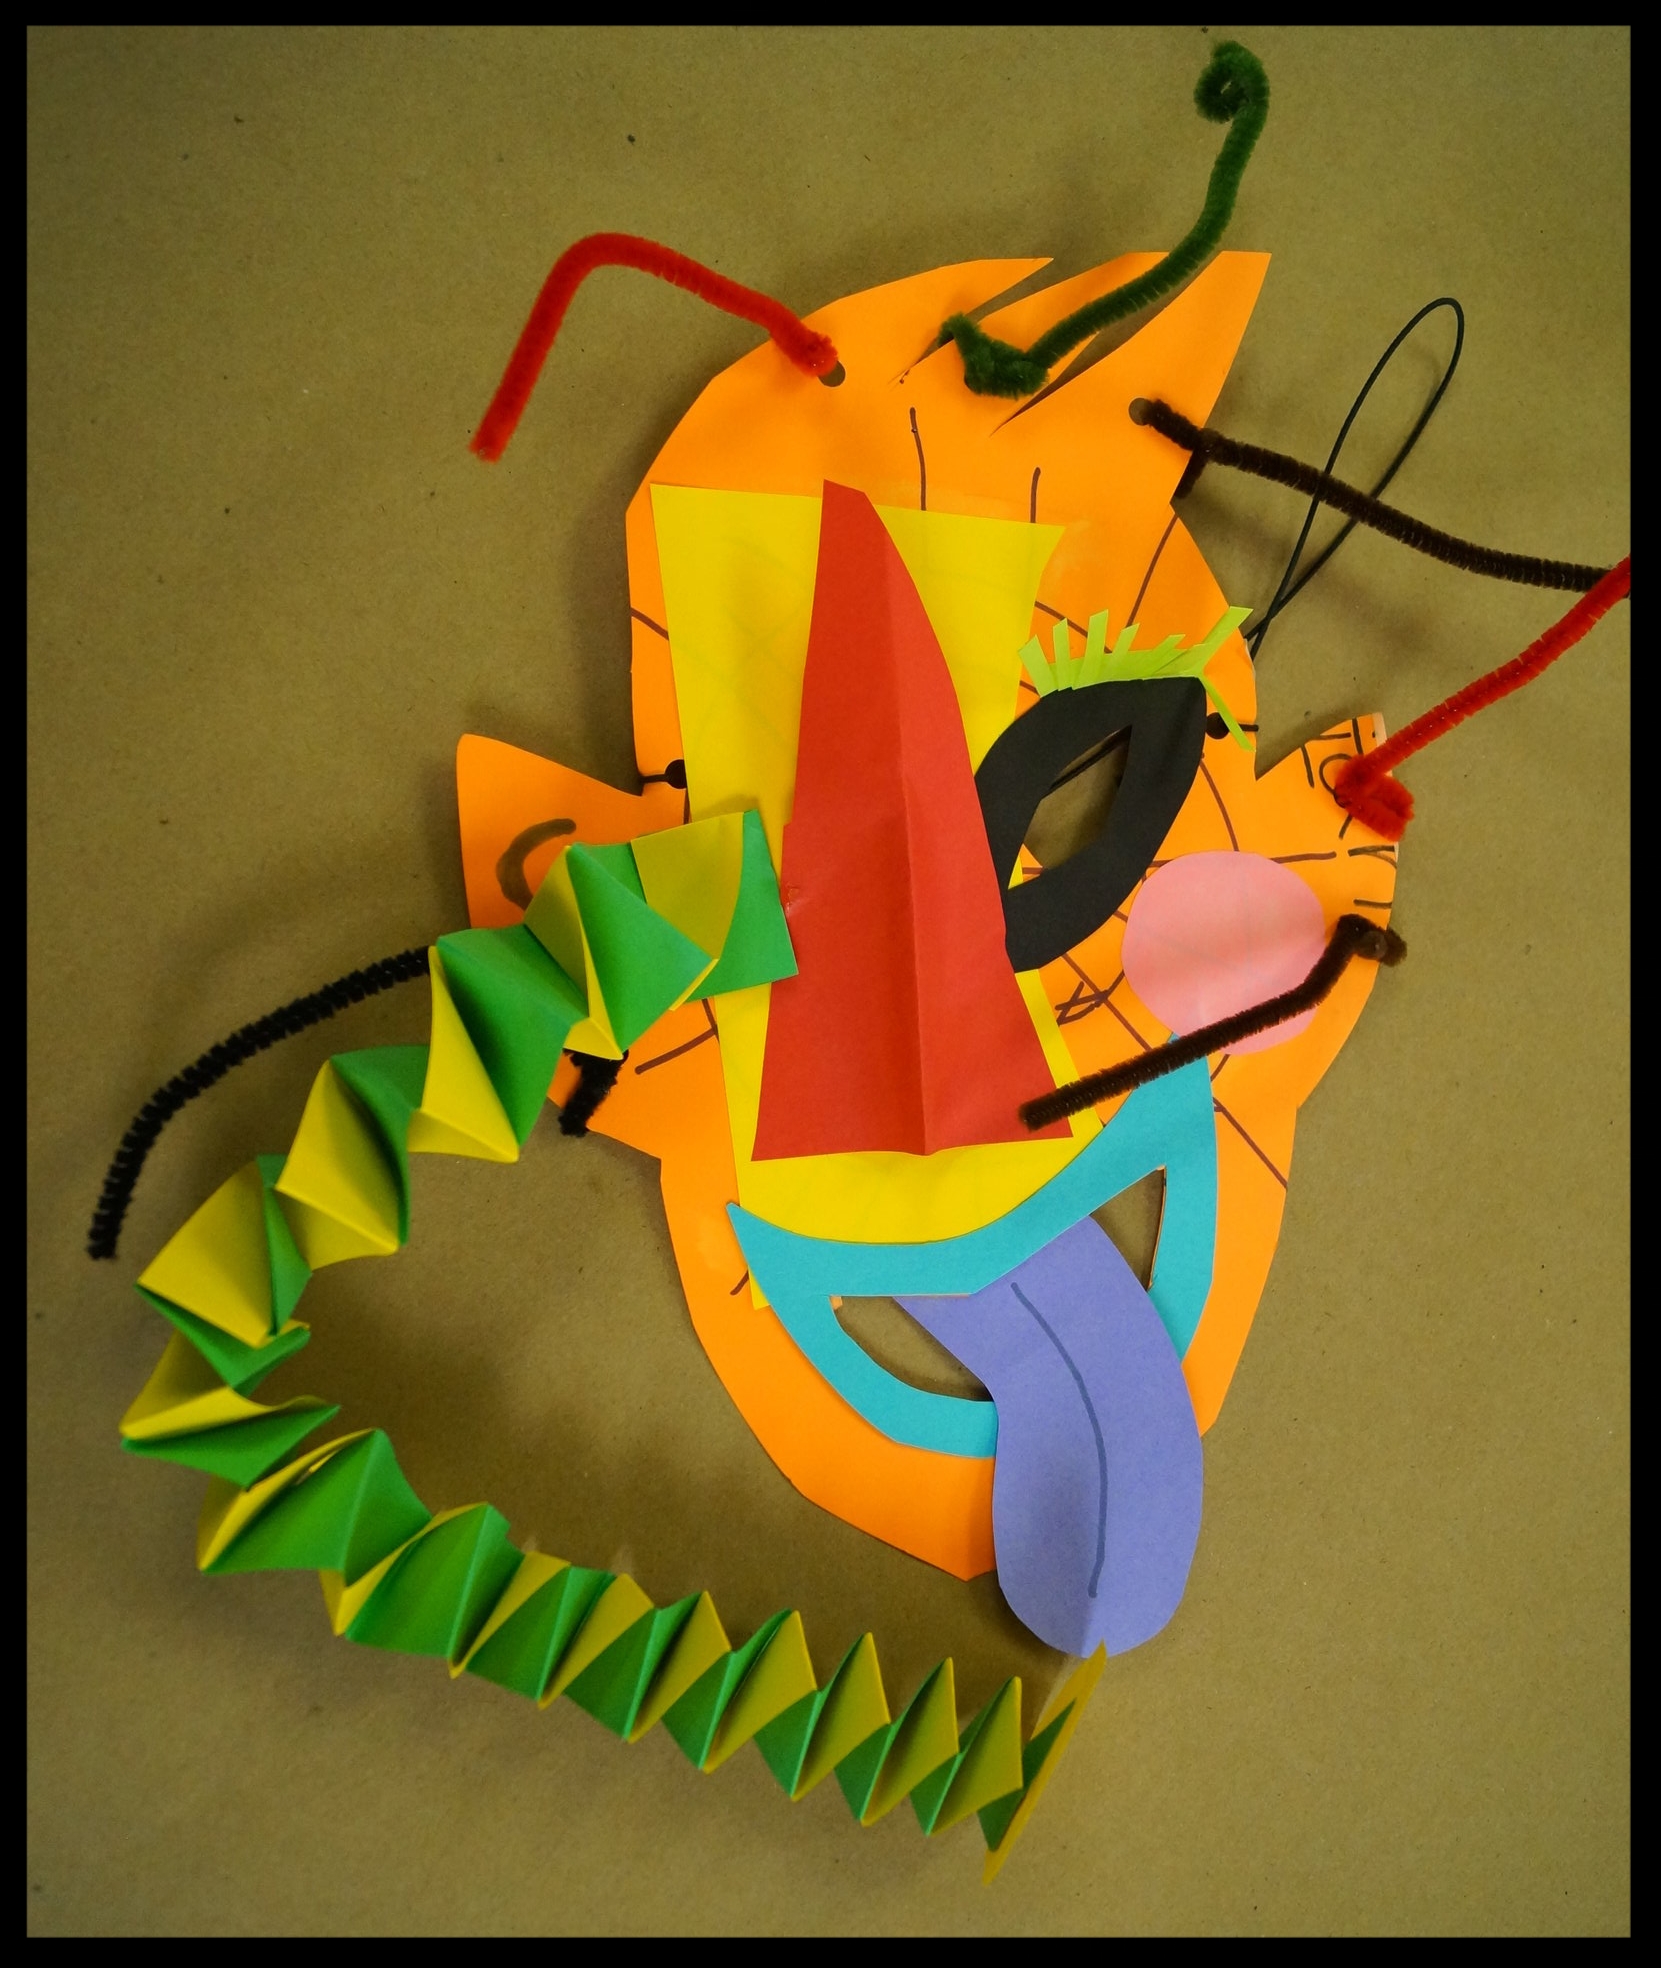
Materials
- Paper or cardstock in different colors
- Scissors
- Hole punch
- Elastic string
- Miscellaneous supplies for decorating
Instructions
Cut out a face of person, animal, etc. Don't forget to cut out eye holes, too!
Punch one hole on the right side of the mask. Repeat on the opposite left side.
Thread some elastic string through the holes and knot it.
Decorate the mask with anything.
Tips
The kids, especially the youngest group, had a fair amount of trouble with this project. It was difficult to make eye holes so that it actually worked as a mask. Have an adult cut the holes out.
For the elastic, you may want to measure some around the wearer's head for reference of how much to use.