
Alesia’s Art Activities
Alesia Lacina has a long history of arts education in Grinnell. Here are some of her favorite art activities for you!
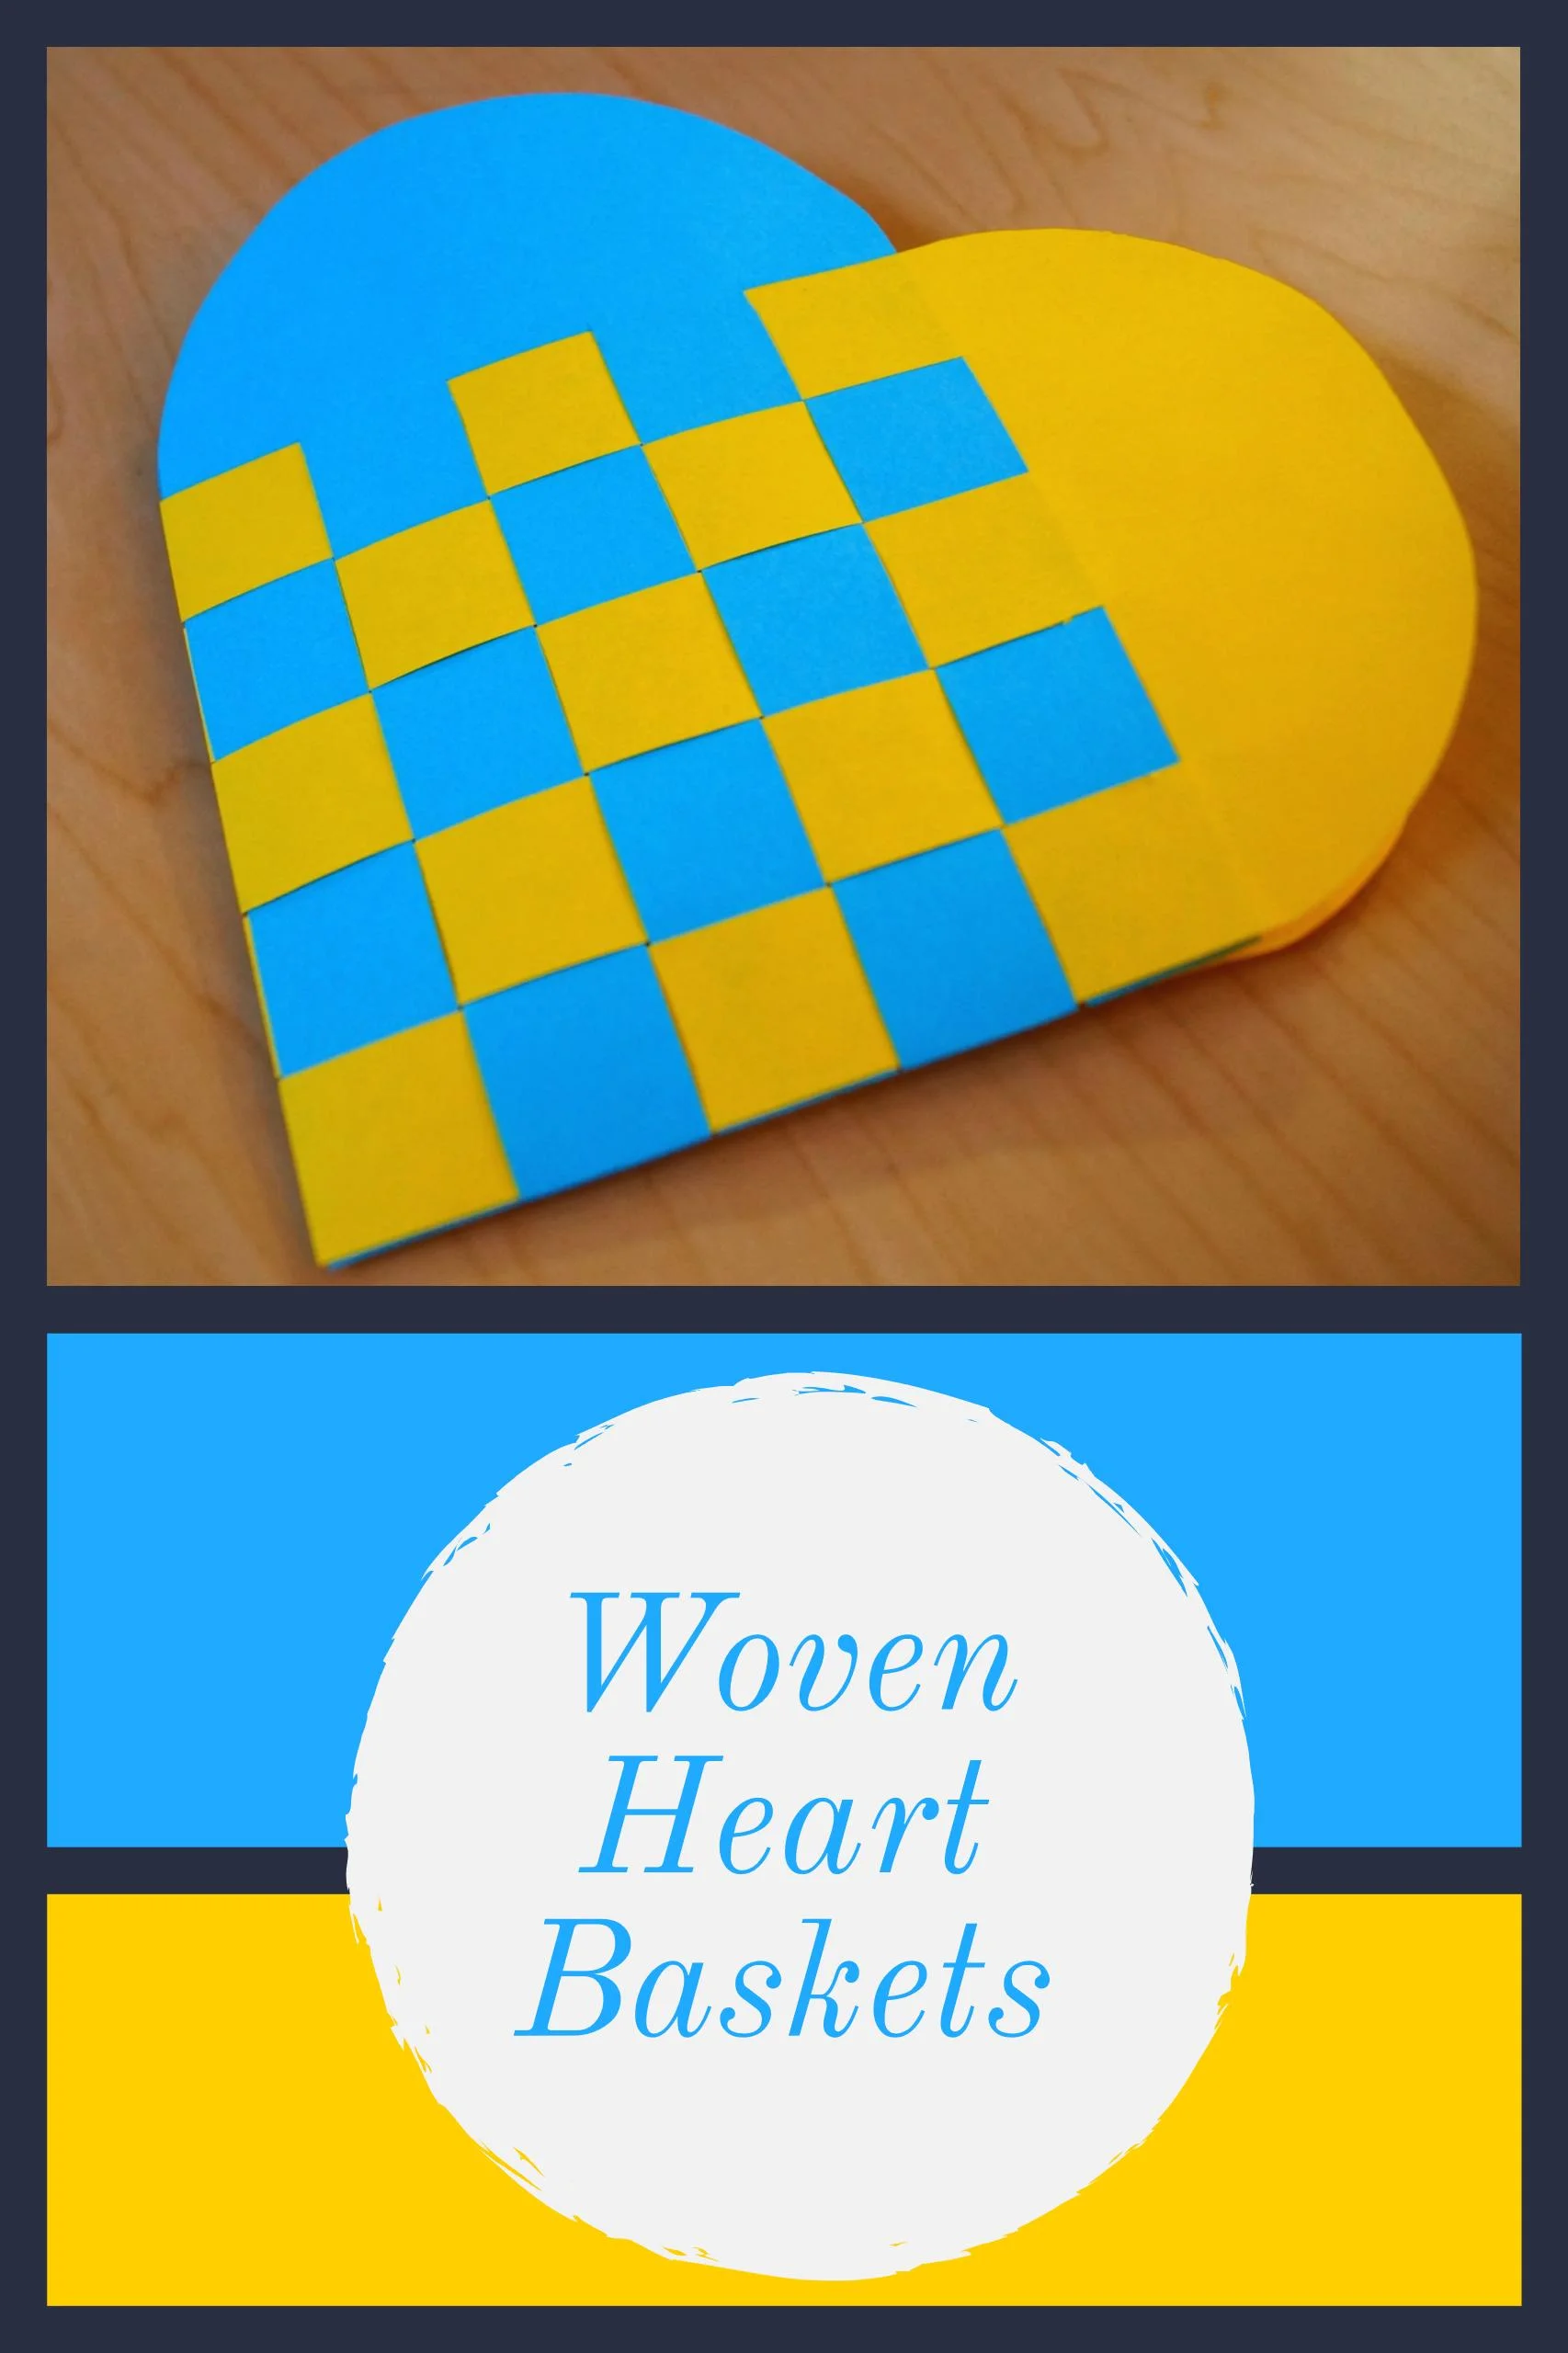
Woven Heart Baskets
Woven heart baskets look cute when finished. Stuffed with a few pieces of candy, they make adorable Valentine's Day gifts. This pattern will make 2 woven baskets.
Fair warning, this project is difficult for a lot of kids---definitely young ones.
Materials
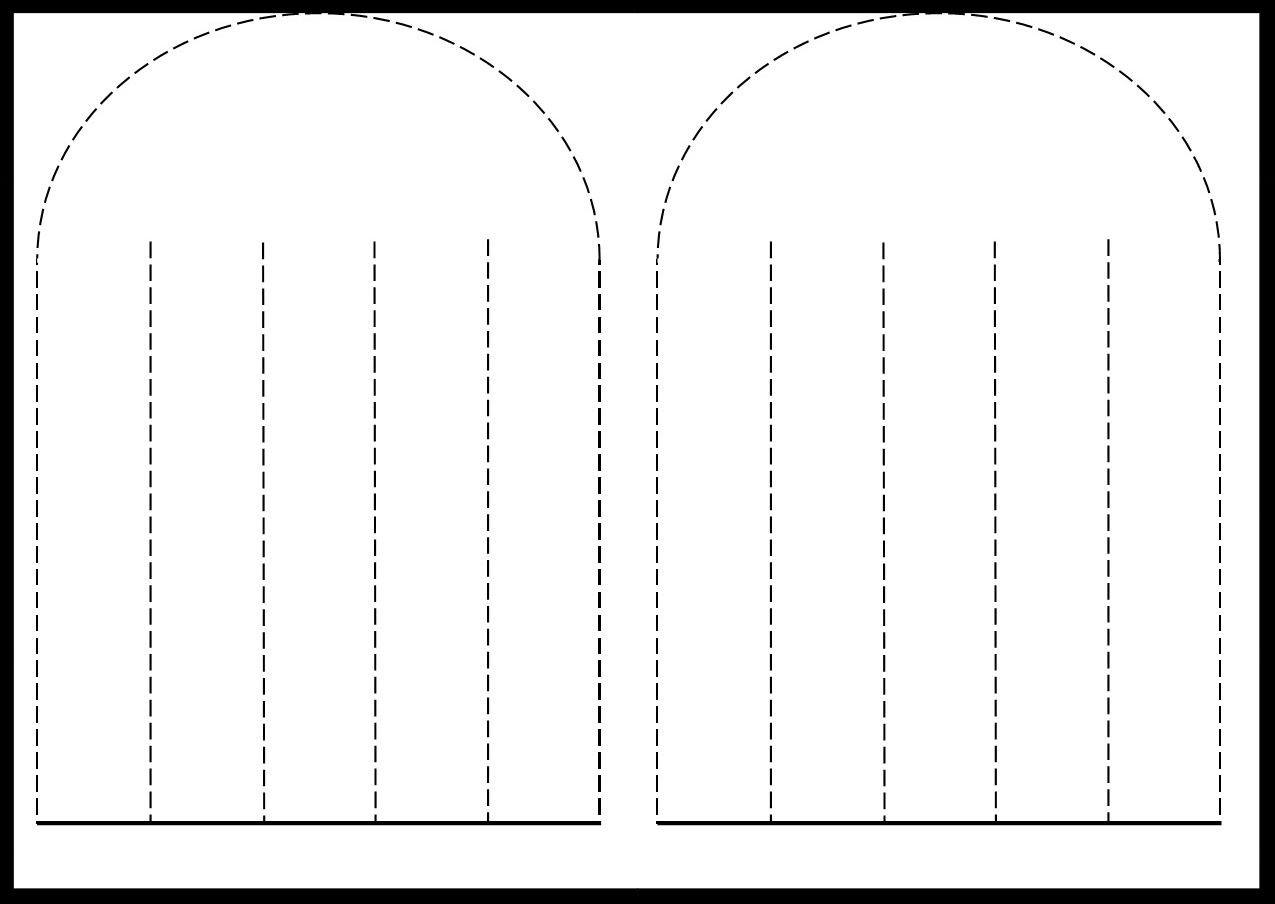
- Heart pattern printed on 2 different colors of paper (PDF at the bottom of the page)
- Scissors
Instructions
- Print out the pattern. Fold the paper in half along the flat bottom line of the pattern.
- Cut along the dotted lines.
- (see pictures below)
3. This is what you have now. The flat bottom of the arches will become the pocket of the basket. Let's call the blue arch, Arch1 and the yellow arch, Arch 2. Each of their 5 strips are indicated by letters.
4. Take strip 2a and open it up slightly. Slip 1a (closed) through the opening of 2a.
5. Now, take 1a and open it up slightly. Slip 2b through this opening.
6. Continue to weave the strips together in the alternating pattern until there is nothing left. 2a---> (through) 1b, 1b--->2b, 1a--->2c, 2c--->1b, 1c--->2a, 2b--->1c, 1c--->2c, etc.
7. Once completed, the basket will look like this. Open it from the top.
Printable PDF Pattern
Tips
- Affix a paper strip to the top to create a handle for the basket, or...
- To make a woven heart that isn't a basket, print out the patterns, but do not fold the papers in half. Cut out the pattern completely and weave. Use tape or glue to hold the ends of the strips down.

Flextangles
Flextangles are so much fun to create and play with. They are a nice activity because they don’t take a lot of materials, but can easily kill some time.
The Flextangle template can be found by clicking on the link below. The instructions are even on the template, so there is no need to include them here.
Tips
- A tacky glue such as rubber cement or tacky craft glue is best. Glue sticks will not hold the paper together well.
Source
- Blog: Babble Dabble Do

Monster Mash-Up Book
This cute mix-n-match flip book can produce some hilarious results! Make it as scary as you want or add more pages to make more combinations.
Materials
- 2 pieces of white printer paper
- 1 piece of construction paper (at least the same size as the white paper)
- Markers
- Stapler & staples
- Scissors
Instructions
- Fold all of the papers in half length-wise (so the page is 4 ¼” x 11”)
- Place the pages inside of each other like a book, with the construction paper as the cover.
- Staple the pages together at the fold. To do so, unfold the pages and staple through the 3 pages at the crease. Close back up like a book.
- Cut the white inside pages horizontally into thirds. The top third will be for heads, the middle for bodies, and the bottom for legs.
- On the first page (all of the thirds) draw a creature, keeping the body sections separated. Repeat for the rest of the 3 pages.
- Flip the different page sections to mix and match body parts and create weird looking monsters.
Tips
- It takes more time, but the book looks nice when the body sections align somewhat. Try your best!
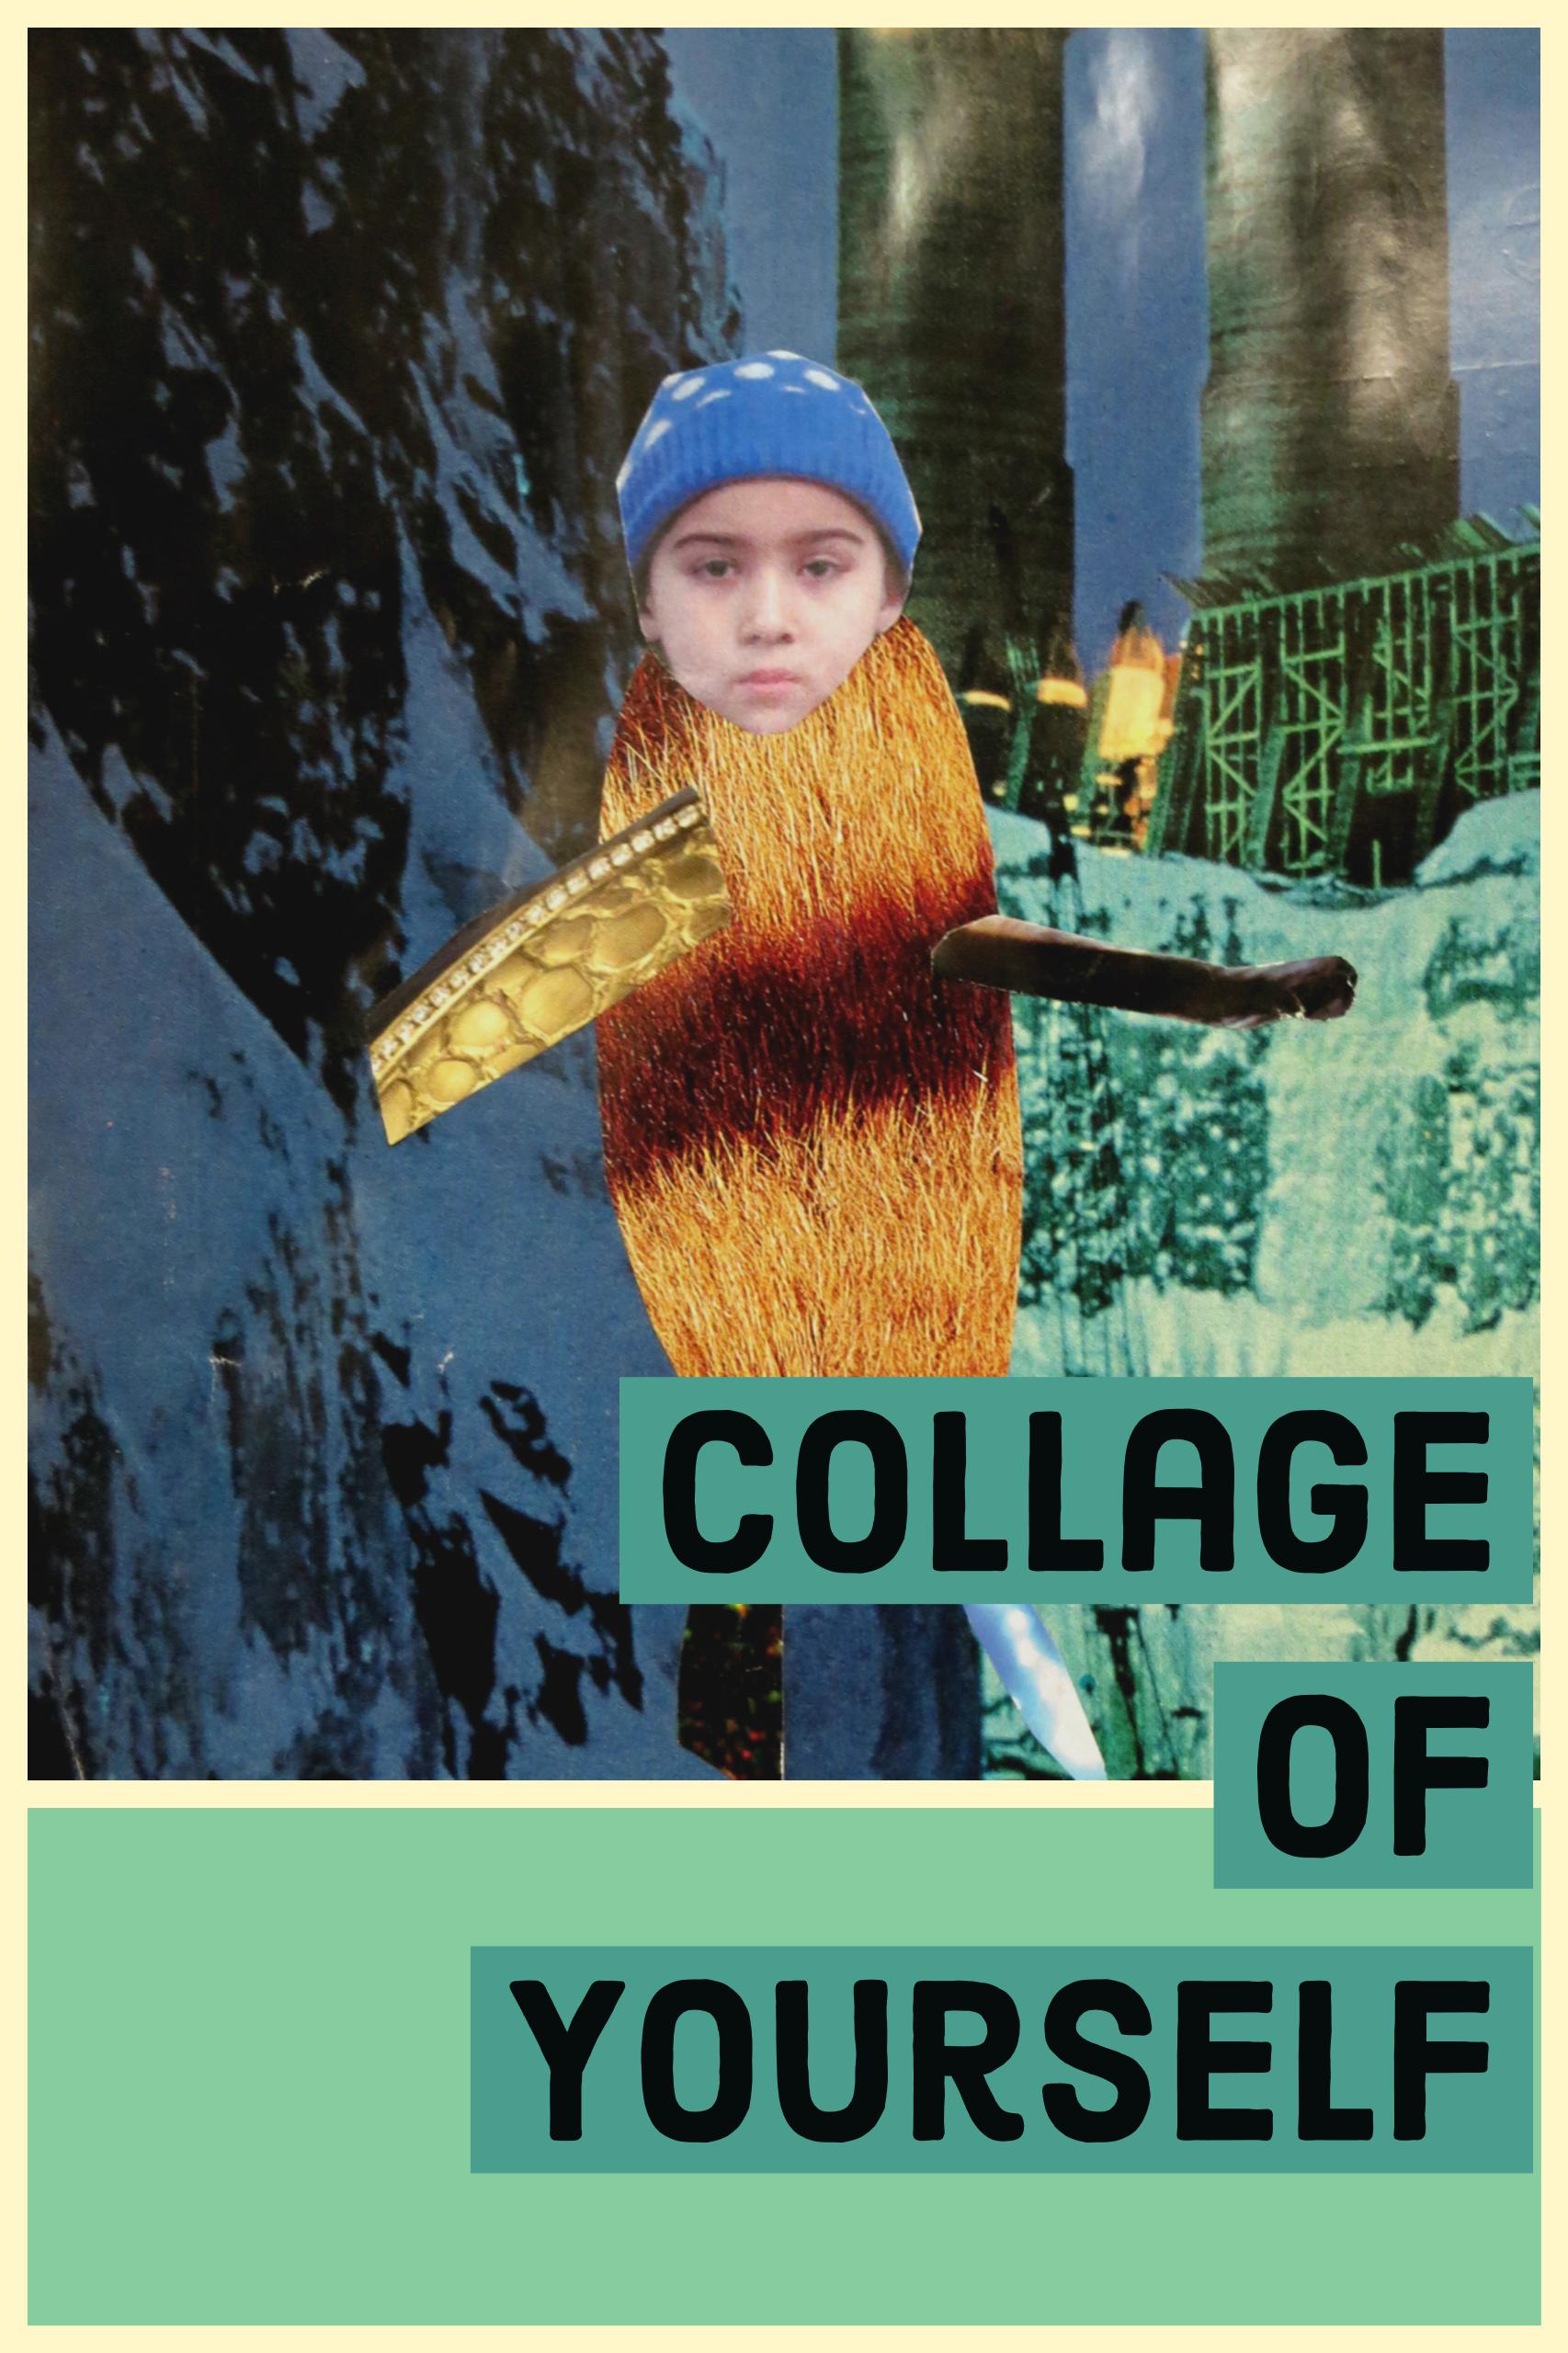
Collage of Yourself
Materials
Small front facing headshot of child printed out
Magazines (National Geographic works really well)
Scissors
Glue
Instructions
- For this project, the kids cut out their heads from the photo. Then they searched through the magazines to find legs, arms, tails, whatever body parts they wanted to make. Have kids cut out their heads from the photo.
Have kids search through magazines to find and cut out:
A full page to use as a backdrop
Body parts
Other things they wanted to add to the background
Put the collage together and glue.
Tips
Encourage the kids to be creative with this project - some of the more interesting finished projects didn’t use animal or human parts for bodies but parts of plants or machinery.

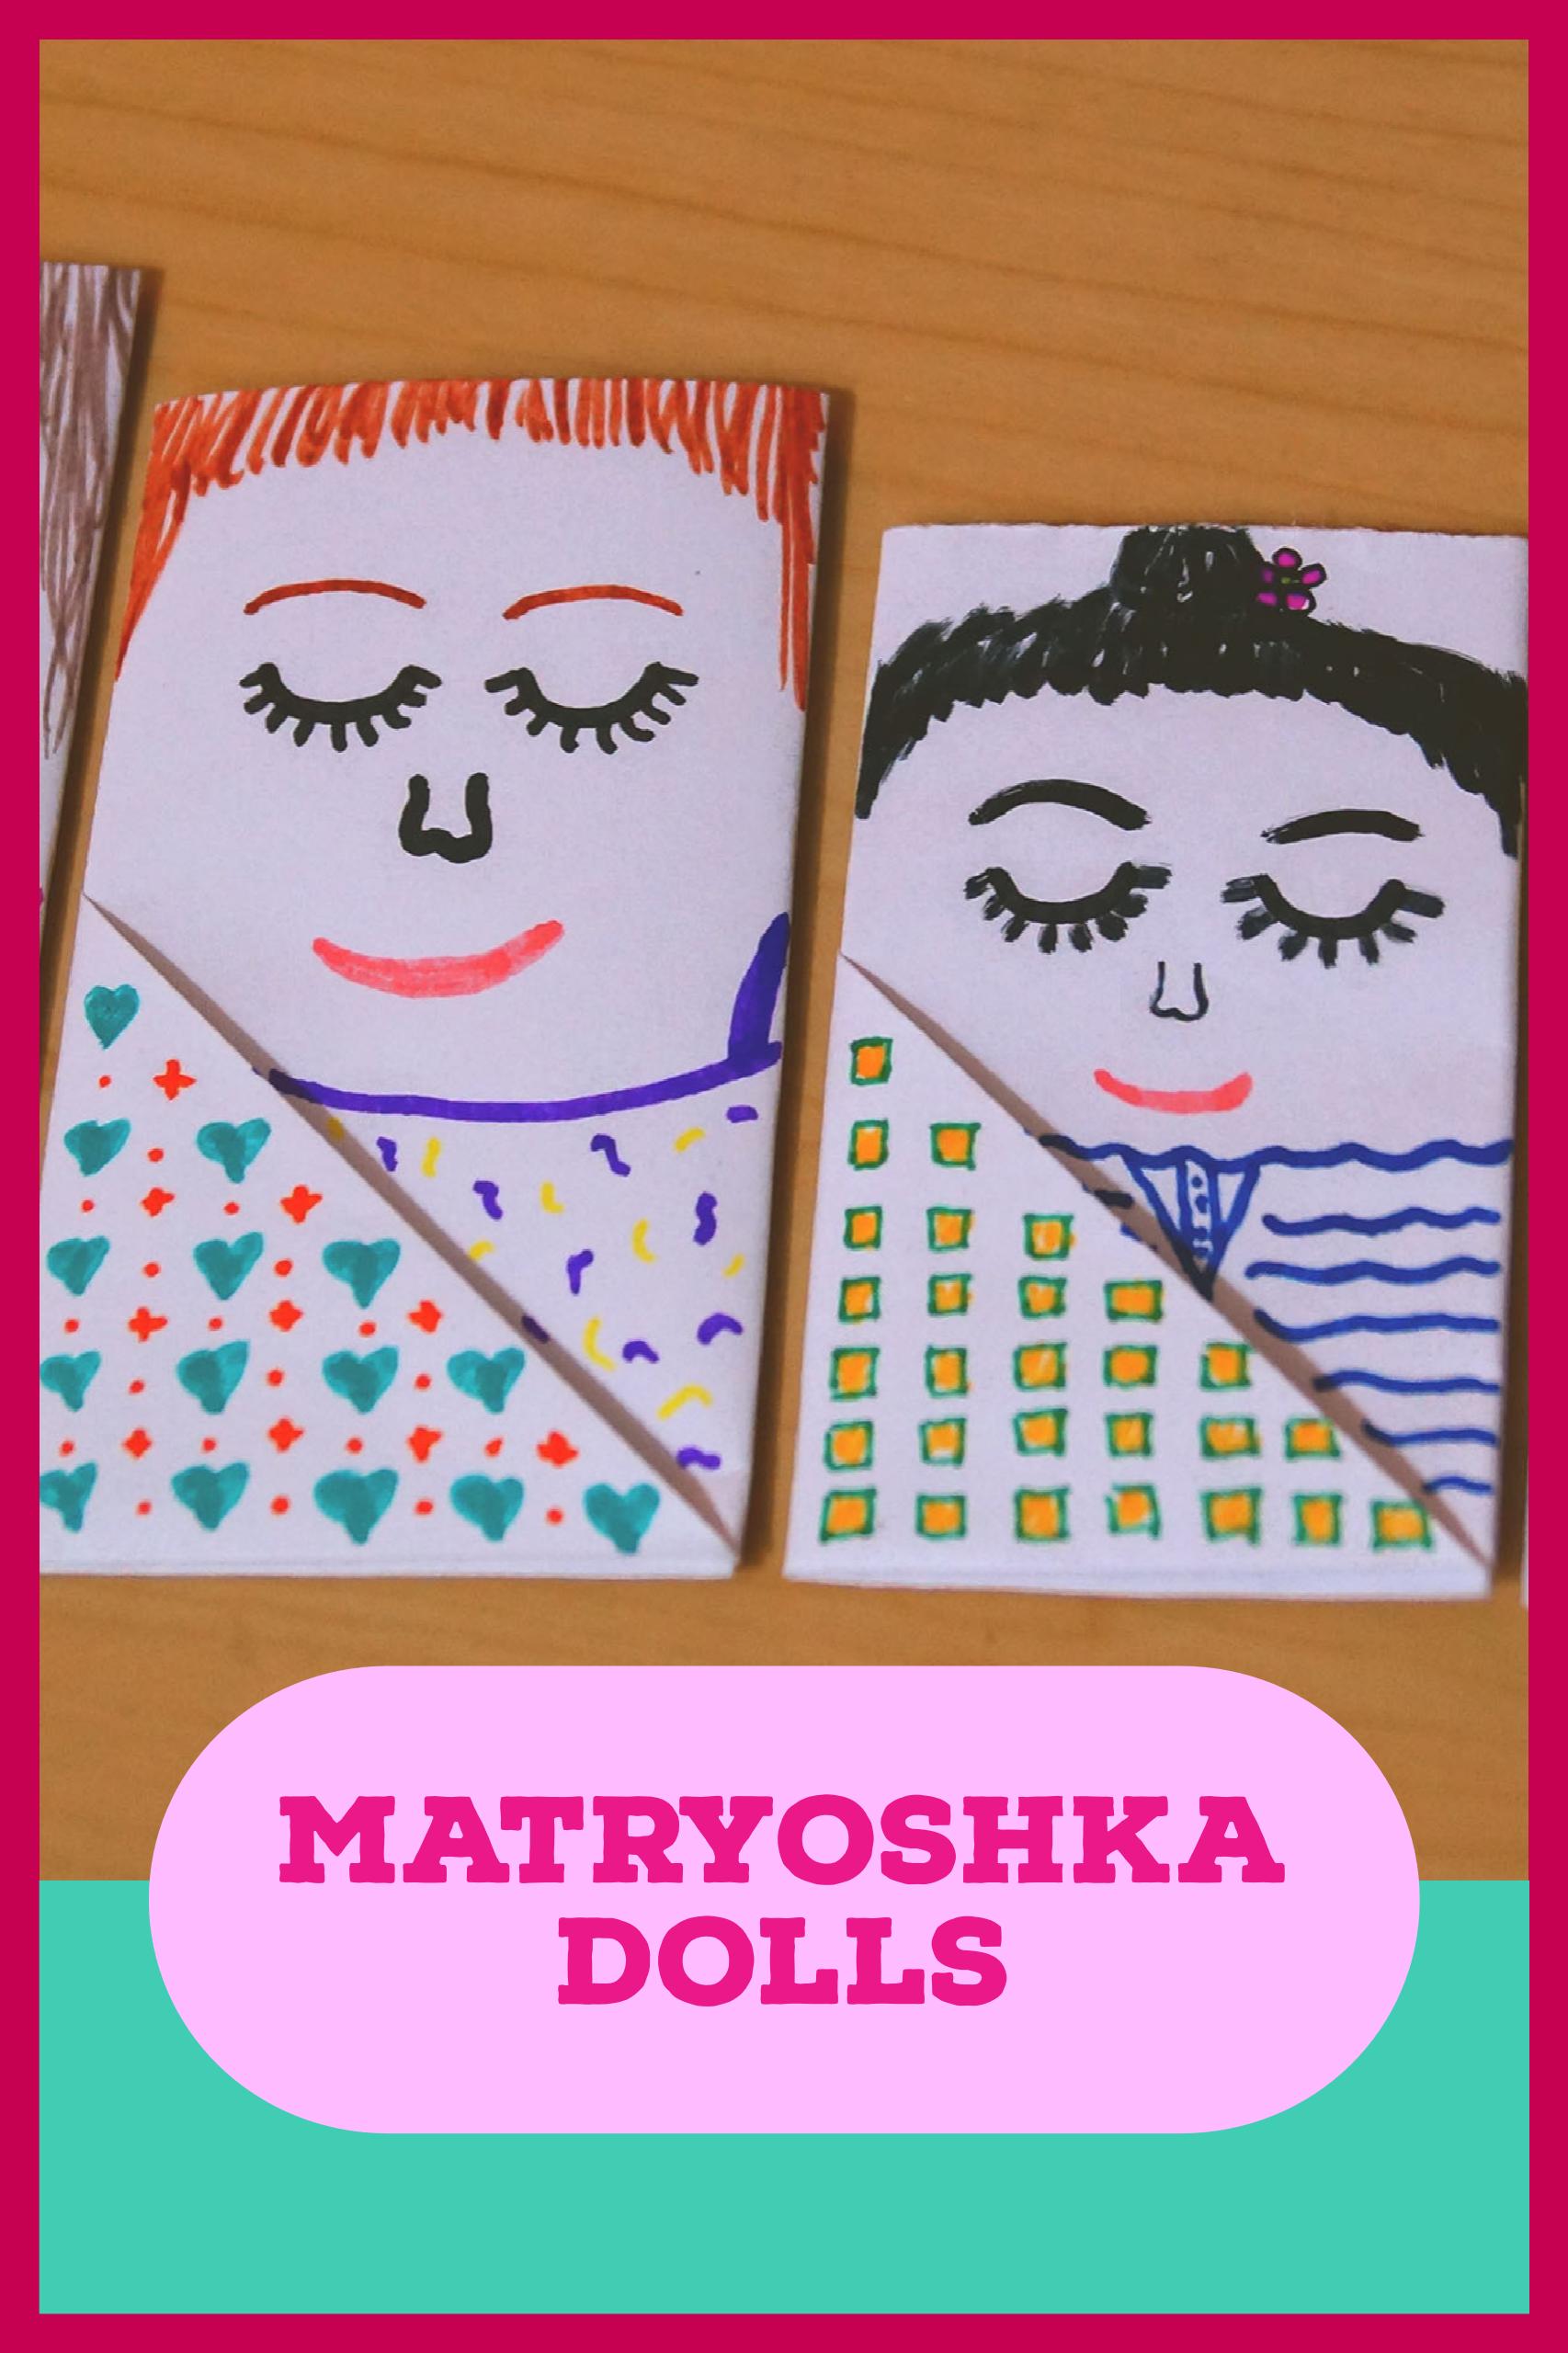
Matryoshka Pockets
Matryoshka dolls, more commonly known as Russian Nesting Dolls, are usually made from carved and intricately painted wood. A small doll nests inside a larger doll, which nests inside an even larger doll. A set is made of five dolls. This version of Matryoshka dolls are made from paper, though.
Materials
- 5 sheets of paper cut to these sizes:
- Doll 1: 8 ½” x 11” paper
- Doll 2: 7 ½” x 10” paper
- Doll 3: 6 ½” x 9” paper
- Doll 4: 5 ½” x 8” paper
Doll 5: 4 ½” x 7” paper
- Ruler
- Pencil
- Scissors
- Coloring materials
Instructions
1. Lay one sheet of paper horizontally.
4. Fold the right side (the rectangular part) in one-third of the way. Repeat so the entire rectangle portion of the paper is folded.
7. To make the smaller dolls, trim an inch off the paper size of the previous doll both vertically and horizontally. Repeat steps 1-5 with each paper to make a set of dolls. When all of the dolls are folded, color them!
2. Take the bottom right corner and fold it up diagonally to create a triangle. There will be a small strip of extra paper to the left of the triangle.
5. Repeat so the entire rectangular part is folded.
3. Fold the paper in half horizontally by bringing the bottom edge up to the top edge. Turn over.
6. Fold the triangular flap to the right, over the rectangle. In the corner, there should be a pocket. Tuck the flap into this pocket. Turn over. This is the largest nesting doll.
Source
- Book: "Handmade Tales: Stories to Make and Tell" by Dianne de Las Casas