
Alesia’s Art Activities
Alesia Lacina has a long history of arts education in Grinnell. Here are some of her favorite art activities for you!
Start a Journal, Diary or Sketchbook
Free Imagination | Write, draw, paint, collage
Not sure what you are feeling? Surrender to the present and find humor in the day, or perhaps something not so humorous. Check out this array of artwork from Alesia’s 15-year-old journals, diary, and sketchbooks.
Make a Simple Book About You


Illustrate and write your story. (Have fun--there are no mistakes!)
Materials:
paper
pencils + markers
glue
yarn, string or pipe cleaners
Instructions:
Fold heavy paper and two plain pieces of paper in half, and then unfold. In the middle crease, poke three holes through all the pages.
Starting from the outside of the book, poke a string through the middle hole.
Then poke the string back through hole one, back through hole three and finally back through the middle hole.
Tie the string ends coming through the middle hole together. Add beads or feathers etc.
Attach head, wings, arms or legs to your book.
Begin to illustrate and write your story.
Optional: Make a series of books about animals, pets, friends or family members.
Graffiti Collage / Say Something
Add words and images to say something provocative!
(Have fun--there are no mistakes!)
Supplies: Glue stick+scissors+magazines and catalogs
How to:
1) Find a background image you like.
2) Find words or individual letters.
3) Cut out images, words or letters.
4) Arrange them and glue them down.

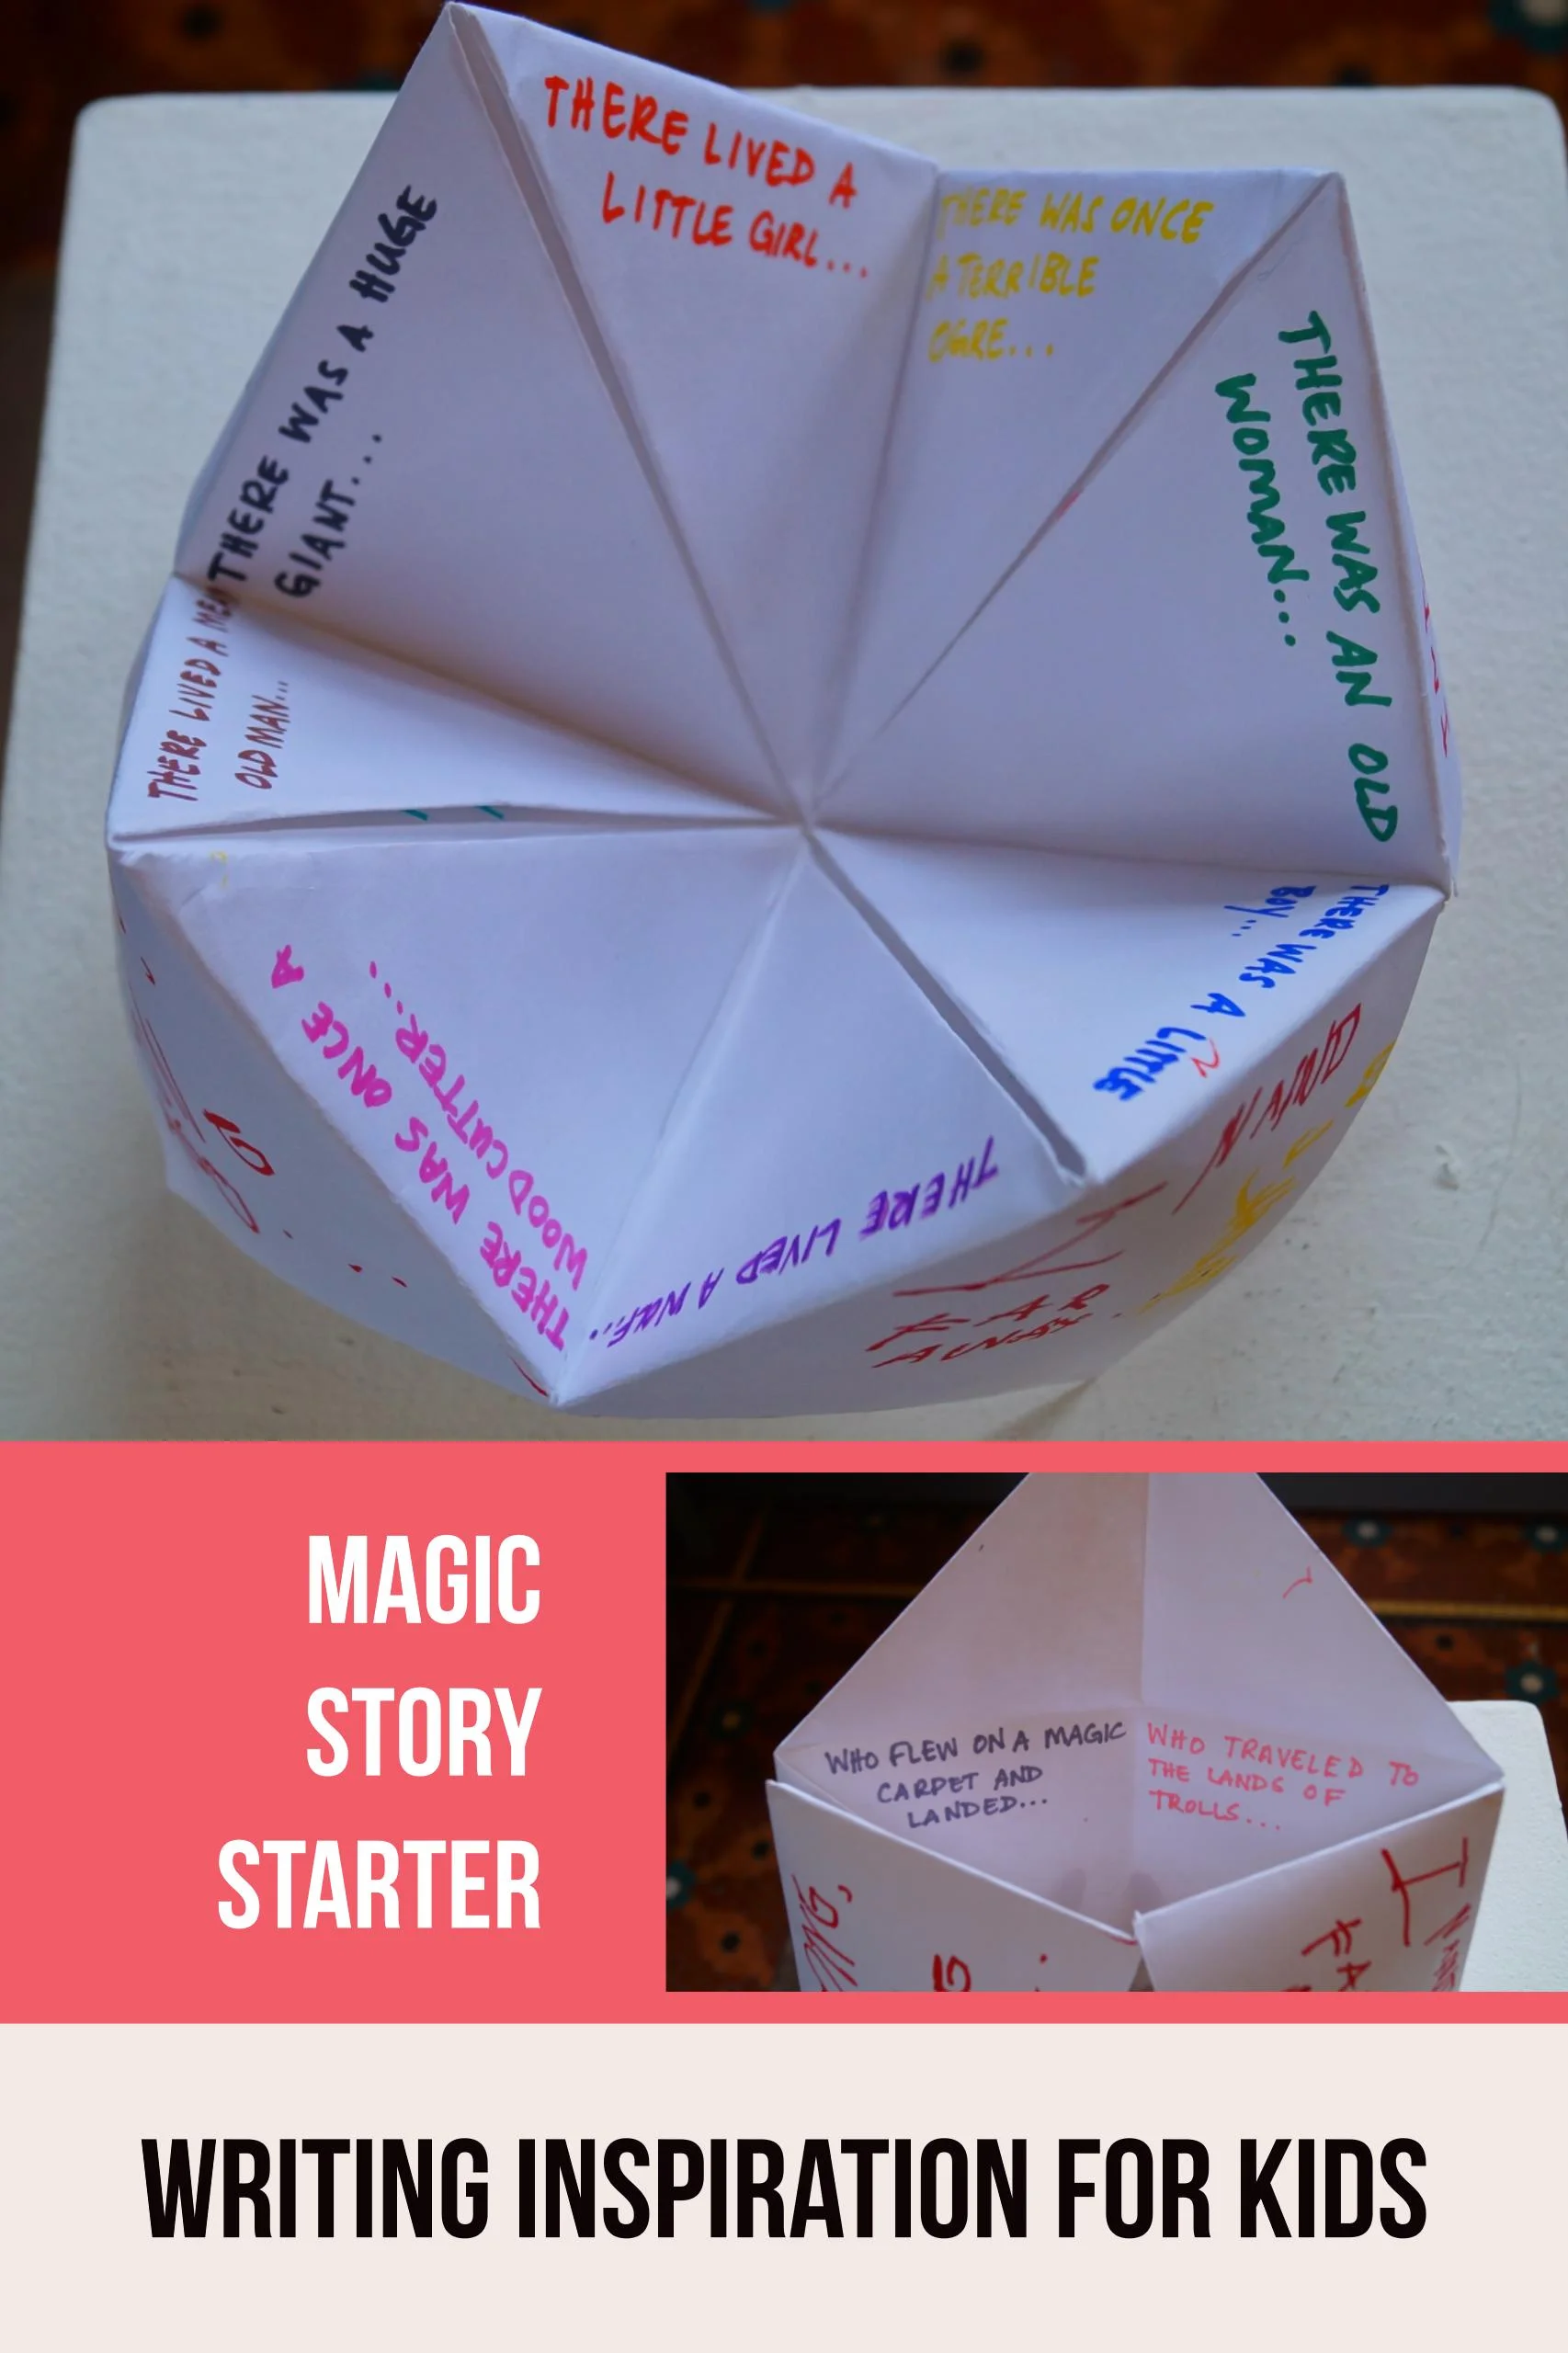
Magic Story Starter
This may seem like an intimidating project if you've never made a fortune teller, but it is fun. And it's a great way to get kids writing! In case of confusion, we added lots of pictures. Still, if you have trouble, don't feel bad! There are many different tutorials on the internet for more help.
Materials
Large square pieces of white paper
Pencils/markers
Instructions
- Fold paper like a fortune teller.
1a. Take a piece of paper and fold it in half, corner to corner. Unfold and repeat with the other corners. You will end up with 2 diagonal creases.
1b. With the paper unfolded back into a square, fold each corner into the center. Do not unfold these.
1c. Flip over. Fold each corner into the center again.
1d. Fold in half to make creases again. These should be horizontal and vertical, though.
1e. With the paper open facing up now, slide one hand underneath into the pockets on the bottom. Place your thumb in one pocket, your fingers in another. Do the same with your other hand. Bring all the points to the middle.
2. Have the kids write the very beginnings of a story on the outer four squares of the fortune teller (ex: Once upon a time..., Long long ago..., Deep in a forest...).
3. On the middle eight triangles, introduce a main character (ex: there was a little boy..., there was a baby dragon..., there was a beautiful princess…). Number each triangle as well.
4. Flipping up one of the flaps of the middle layer reveals the final, third layer. On this layer, write an action on each triangle that corresponds to the character on the middle layer triangle above (ex: who walked through a magic door and found himself in..., who was just learning to fly, when..., who picked an enchanted flower that...)
5. To use the story starter, have someone choose a story opening. As you say each word aloud, flap the fortune teller open from side to side. Once for each word. Next, have someone choose a number from the visible triangles. Flap the fortune teller open from side to side however many times the number indicates. Finally, have someone pick another number from the four visible triangles to determine a character. Lift the flap to reveal what the character does. At this point, the kids can write their own stories with the story beginning given.
Tips
Letting the kids make up their own characters and actions makes it more fun for everyone!
A story could be written as a group or individually.
Outer squares of the fortune teller: story opening
Middle triangles of the fortune teller: introduction of a main character (we forgot to number them, but you should mark yours)
Sources
- Book: "Handmade Tales: Stories to Make and Take," by Dianne de Las Casas